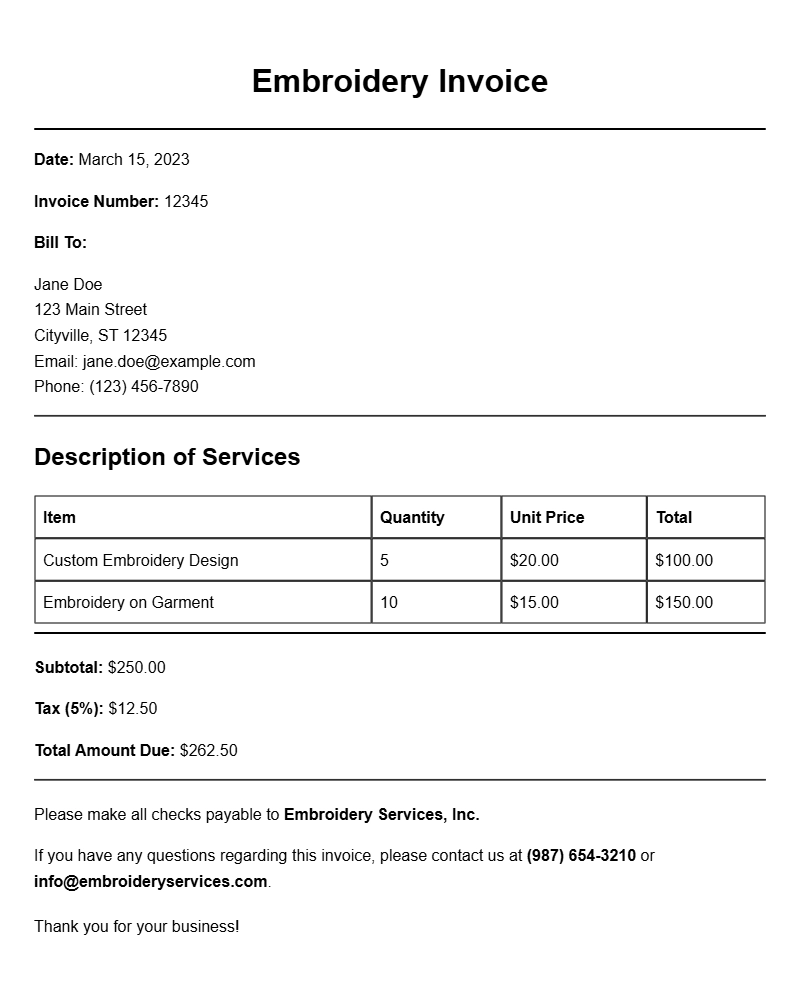
If you’re running a custom embroidery business, you know how important it is to keep your financial records organized. A custom embroidery invoice template can streamline your billing process and help present a professional image to your clients. This article will guide you through what these templates are, when to use them, their essential components, how to write one, and some tips to customize your template effectively.
WHAT IS A CUSTOM EMBROIDERY INVOICE TEMPLATE?
A custom embroidery invoice template is a pre-designed document that helps you bill clients for your embroidery services. It typically includes details about the services rendered, pricing, and payment terms. Using a template saves time and ensures consistency in your invoicing process.
WHEN TO USE A CUSTOM EMBROIDERY INVOICE TEMPLATE
You should use an invoice template whenever you complete a project for a client. Whether it’s a single order or a large bulk project, having a clear invoice helps both you and your client understand the transaction. This is especially useful for freelance embroiderers or small businesses that need to maintain clear records for tax purposes.
KEY COMPONENTS OF AN EMBROIDERY INVOICE
- Business Information: Your name, logo, address, phone number, and email.
- Client Information: The name and contact details of the person or company you are invoicing.
- Invoice Number: A unique identifier for each invoice.
- Date: The date you issue the invoice.
- Description of Services: Details about the embroidery work completed.
- Pricing: Breakdown of costs, including any taxes or discounts.
- Payment Terms: Information on how and when to pay, including accepted payment methods.
STEP-BY-STEP GUIDE TO WRITING AN INVOICE
- Choose a Template: Start with a basic design that fits your brand.
- Fill in Your Business Details: Include your logo and contact information at the top.
- Add Client Details: Clearly state the recipient’s name and address.
- Assign an Invoice Number: Use a numbering system that makes sense for your business.
- Include the Date: This helps track payment timelines.
- List Your Services: Be specific about what you did, including quantities and descriptions.
- Detail the Costs: Clearly outline the pricing for each item or service.
- State Payment Terms: Specify when the payment is due and how it can be made.
EXAMPLES OF CUSTOM EMBROIDERY INVOICE TEMPLATES
Here’s a basic snippet you can edit for your needs:
Your Logo
Your Business Name
Your Address
Your Phone Number
Your Email
Invoice Number: 001
Date: [Insert Date]
Bill To:
Client Name
Client Address
Description Quantity Unit Price Total
Custom Embroidery 1 $50.00 $50.00
Shipping 1 $10.00 $10.00
Subtotal: $60.00
Tax (if applicable): $6.00
Total Amount Due: $66.00
Payment Terms: Due upon receipt. Accepts PayPal, bank transfer, or check.
COMMON MISTAKES TO AVOID
- Not including a clear payment due date, which can lead to delayed payments.
- Overlooking itemized descriptions, making it hard for clients to understand charges.
- Forgetting to proofread for spelling and grammatical errors that can affect professionalism.
TIPS FOR CUSTOMIZATION
Make your invoice stand out by customizing it to fit your brand. You can change colors, fonts, and layout to match your business’s style. Consider adding a personal touch, like a thank-you note or a discount for repeat customers. This not only enhances your branding but also builds client loyalty.
Using a custom embroidery invoice template effectively can save you time and help you manage your finances better. With the right template, you’ll present your work professionally while keeping your billing organized and straightforward. Don’t hesitate to tweak your templates as your business evolves, ensuring they always reflect your brand accurately.
Editable Document Format Examples