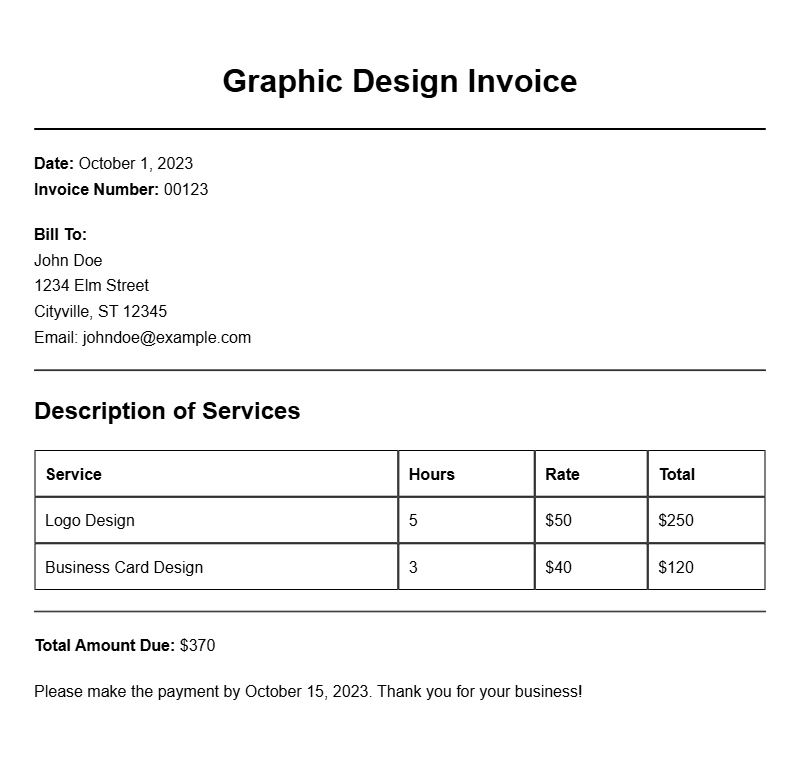
If you’re a graphic designer, you know how important it is to get paid for your hard work. A well-structured graphic design invoice template can simplify this process, ensuring you get your payments on time while presenting a professional image to your clients. Let’s explore what these templates are, when to use them, and how to make one that suits your needs.
WHAT IS A GRAPHIC DESIGN INVOICE TEMPLATE?
A graphic design invoice template is a pre-formatted document that allows designers to itemize their services and bill clients accordingly. This template typically includes sections for project details, hours worked, rates, and payment terms. Using a template saves time and helps maintain consistency in your invoicing.
WHEN TO USE A GRAPHIC DESIGN INVOICE TEMPLATE
These templates are ideal for various scenarios, such as:
- Billing clients for completed projects, whether it’s a logo design, website layout, or marketing materials.
- Charging for hourly work, allowing clients to see the breakdown of time spent on tasks.
- Invoicing for ongoing services like branding or social media graphics, where recurring charges may apply.
KEY COMPONENTS OF A GRAPHIC DESIGN INVOICE
A solid graphic design invoice should include:
- Your contact information: Name, address, phone number, and email.
- Client’s contact details: Name, company, and relevant contact information.
- Invoice number: A unique identifier for tracking purposes.
- Project description: A brief outline of the services provided.
- Itemized list of services: Break down hours worked, rates, and total amounts.
- Payment terms: Specify payment methods, due dates, and any late fees.
STEP-BY-STEP GUIDE TO WRITING YOUR INVOICE
Creating your invoice can be straightforward. Here’s a step-by-step process:
- Choose a template: Start with a basic template you can customize. You can find free templates online or use software like Microsoft Word, Google Docs, or specialized invoicing tools.
- Fill in your details: Add your name, address, and contact information at the top.
- Add client information: Include your client’s name and details directly below yours.
- Assign an invoice number: This helps both you and your client keep track of payments.
- Describe the project: Provide a brief overview of what you worked on.
- Itemize your services: List each service with its corresponding rate and total. For example, “Logo Design: 10 hours @ $50/hour = $500.”
- State payment terms: Clearly outline when and how the client should pay.
- Review and send: Double-check for accuracy before sending the invoice via email or your preferred method.
EXAMPLES OF INVOICE TEMPLATES
Here are a couple of snippets to illustrate how your invoice might look:
Invoice Number: 001
Date: [Insert Date]
From: Your Name
To: Client’s Name
Project: Logo Redesign
- Initial Concept: 5 hours @ $50/hour = $250
- Revisions: 2 hours @ $50/hour = $100
Total Due: $350
COMMON MISTAKES TO AVOID
When crafting your invoice, watch out for these pitfalls:
- Leaving out important client details, which can delay payment.
- Forgetting to include an invoice number, making it hard to track.
- Not specifying payment terms, leading to confusion about when payment is expected.
TIPS FOR CUSTOMIZATION
Personalizing your invoice can make a significant difference. Here are a few tips:
- Incorporate your branding: Use your logo and brand colors to maintain consistency.
- Include a personal note: A brief thank-you message can enhance your client relationship.
- Consider adding a payment link: If you use online payment systems, link directly to facilitate quicker transactions.
Using a graphic design invoice template can streamline your billing process and help ensure you get paid promptly. By following these guidelines, you’ll create clear, professional invoices that reflect the quality of your work. For more examples and templates, check out resources like final payment invoices or charity gala invoices to inspire your own designs.
Template Variations & Sample Formats