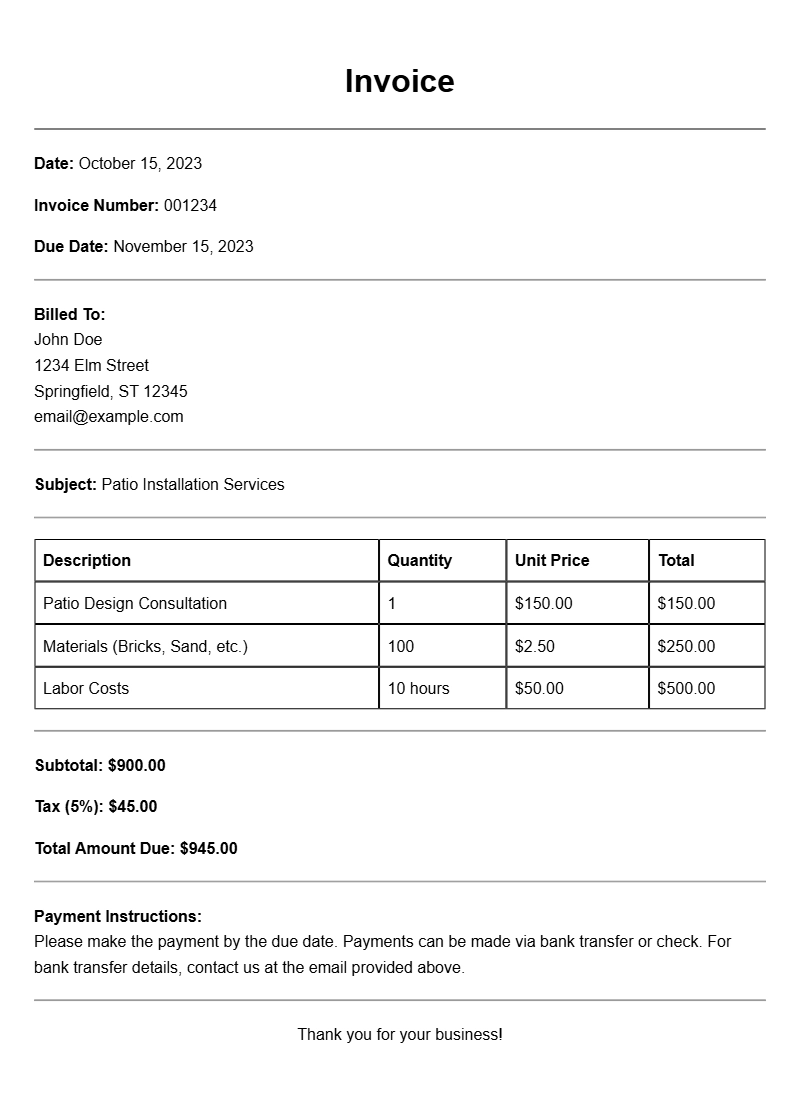
When you’re planning a new patio installation, having a clear and detailed invoice can help both you and your contractor stay organized and on the same page. An effective invoice not only outlines the costs but also serves as a record of the services provided. In this guide, we’ll walk through what a patio installation invoice looks like, when to use it, and how to create one that meets your needs.
WHAT IS A PATIO INSTALLATION INVOICE?
A patio installation invoice is a document provided by a contractor to a client detailing the work performed and the costs associated with the project. This invoice should include the price of materials, labor, and any additional fees or taxes. Essentially, it’s a formal request for payment and a record of the transaction.
WHEN IS IT USED?
You typically use a patio installation invoice once the project is completed or at agreed-upon milestones during a larger project. It’s crucial for ensuring that both parties are aware of the financial commitments and expectations. Having a clear invoice helps to avoid disputes and provides a basis for tracking expenses.
KEY COMPONENTS OR SECTIONS
Here are the essential sections to include in your patio installation invoice:
- Contact Information: Include your name, address, phone number, and email, along with the contractor’s details.
- Invoice Number: Assign a unique number for tracking purposes.
- Date of Issue: The date the invoice is created.
- Description of Services: A detailed list of the work done, including materials used.
- Total Costs: Break down the costs for materials, labor, and taxes.
- Payment Terms: Specify when payment is due and accepted payment methods.
STEP-BY-STEP WRITING GUIDE
Creating a patio installation invoice is straightforward. Follow these steps:
- Start with your contact information at the top.
- Add the contractor’s contact details beneath yours.
- Include the invoice number and date.
- Write a clear description of the services provided.
- List out costs, itemizing materials and labor for clarity.
- Define payment terms and methods.
REALISTIC EXAMPLES/TEMPLATES
Here’s a basic template to help you get started:
[Your Name]
[Your Address]
[City, State, Zip]
[Email]
[Phone Number]
[Contractor’s Name]
[Contractor’s Address]
[City, State, Zip]
Invoice #: [#]
Date: [MM/DD/YYYY]
Description of Services:
– Installation of [Material Type] patio
– Labor for installation
Cost Breakdown:
– Materials: $[amount]
– Labor: $[amount]
– Taxes: $[amount]
Total Due: $[total amount]
Payment Terms: Payment due by [date]. Acceptable methods: [cash/check/credit card].
COMMON MISTAKES TO AVOID
When creating your invoice, steer clear of these common pitfalls:
- Not itemizing costs, which can lead to confusion.
- Failing to include the payment terms, leaving it unclear when payment is due.
- Using vague descriptions that don’t clearly communicate the services rendered.
TIPS FOR CUSTOMIZATION
To make your invoice more effective, consider these customization tips:
- Use your branding, such as a logo or color scheme, to make the invoice look professional.
- Include a brief note thanking the client for their business, creating a positive impression.
- Adjust the layout to match your style, making it easier for you to read and understand.
Having a well-structured patio installation invoice is key to smooth transactions and clear communication with your clients. By following this guide, you can create a useful template that meets your needs and helps avoid misunderstandings in the future. For more related resources, check out our templates for rush service invoices or construction manager invoices.
Ready-to-Use Document Samples