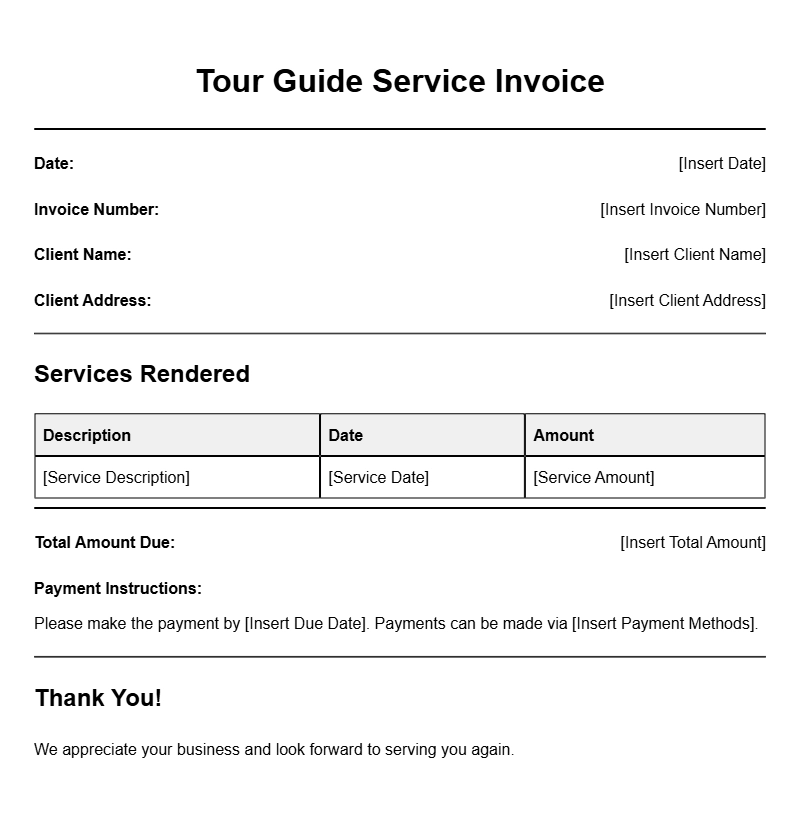
When you’re running a tour guide service, keeping your finances organized is as important as providing a memorable experience for your clients. One essential aspect of this is having a professional invoice ready to go when you complete a tour. Using invoice templates tailored for tour guide services can save you time and ensure you don’t miss critical details. Let’s explore what these templates are, when to use them, and how to create your own.
WHAT IS A TOUR GUIDE SERVICE INVOICE TEMPLATE?
A tour guide service invoice template is a pre-designed document that you can fill out with the specific details of your services. It typically includes sections for your business information, client details, a breakdown of services offered, pricing, and payment terms. This template helps you present a professional image while clearly communicating your charges to clients.
WHEN TO USE TOUR GUIDE SERVICE INVOICE TEMPLATES
These templates come into play after you’ve conducted a tour. Whether you’re running private city tours, adventure excursions, or cultural experiences, having an invoice ready ensures you get paid promptly. It’s especially useful for:
- One-time tours
- Recurring clients
- Corporate events
- Group bookings
KEY COMPONENTS OF AN INVOICE TEMPLATE
Every effective invoice should include the following critical sections:
- Your Business Information: Include your name, address, contact details, and logo.
- Client Information: Add the client’s name and contact details.
- Invoice Number: A unique number for each invoice helps with tracking.
- Date: When the invoice is issued.
- Description of Services: List the tours provided, dates, and any additional services.
- Pricing: Clearly outline the costs associated with each service.
- Total Amount Due: The overall cost that the client needs to pay.
- Payment Terms: Include details on how and when to pay.
STEP-BY-STEP GUIDE TO WRITING YOUR INVOICE
- Choose a Template: Start with an editable template that suits your style.
- Fill in Your Business Details: Make sure your contact information is current.
- Add Client Information: Be accurate with names and addresses to avoid issues.
- List Services: Be specific about what the client is being charged for.
- Calculate the Total: Make sure to double-check your math.
- Specify Payment Terms: Clarify accepted payment methods and due dates.
REALISTIC EXAMPLES OF INVOICE TEMPLATES
Here’s a simple template snippet to get you started:
Your Business Name
Your Address
Your Phone Number
Your Email
Date: [Invoice Date]
Invoice Number: [Unique Number]
Bill To:
Client Name
Client Address
Description of Services:
– City Tour on [Date] – $[Price]
– Additional Service (if any) – $[Price]
Subtotal: $[Subtotal]
Tax: $[Tax Amount]
Total Amount Due: $[Total]
Payment Terms: Due within [X days]. Accepting [Payment methods].
COMMON MISTAKES TO AVOID
When creating invoices, some frequent pitfalls include:
- Not including a unique invoice number, making tracking difficult.
- Forgetting to add tax or service fees.
- Using vague descriptions that don’t clarify what the client is paying for.
- Neglecting to state payment terms, which can lead to delayed payments.
TIPS FOR CUSTOMIZATION
Your invoices should reflect your brand and fit your style. Here are some customization tips:
- Add your logo to establish brand recognition.
- Use colors and fonts that match your overall branding.
- Consider including a personal note thanking the client for their business.
Creating a polished invoice doesn’t have to be a chore. With a well-structured template, you can streamline your billing process and maintain professionalism. When you’re ready to explore more specialized templates for other services, check out our resources on office cleaning invoices, locksmith services, bike mechanics, photographers, and advance payments. Happy invoicing!
Document Structure & Example Models