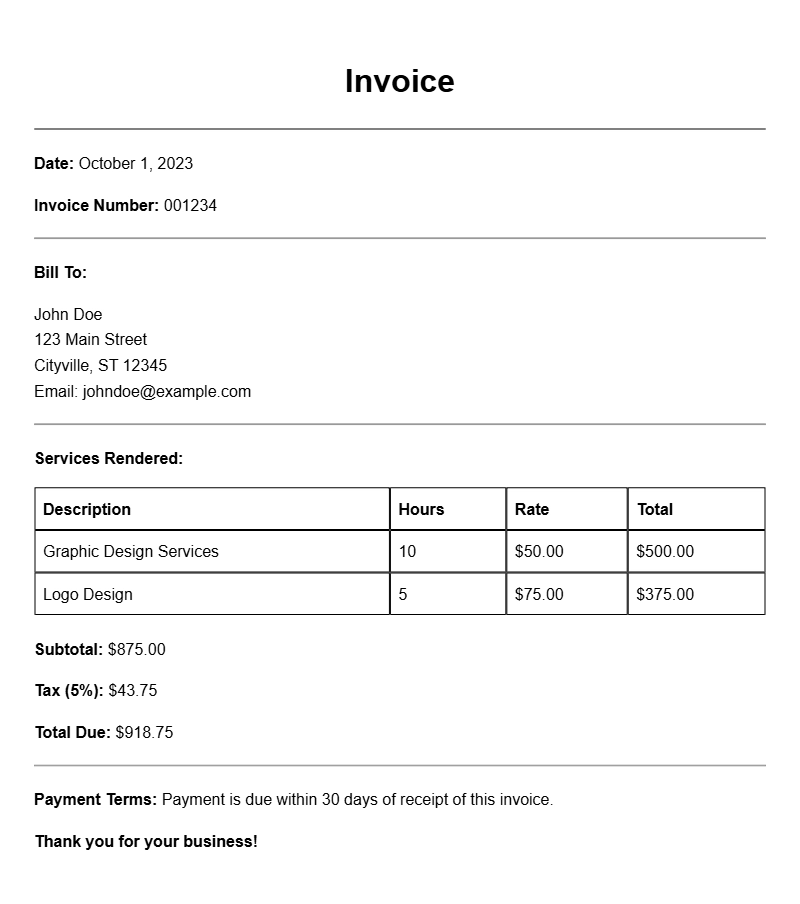
Creating an illustrator invoice can sometimes feel like a daunting task, especially when you want to ensure you get paid on time and maintain a professional appearance. Whether you’re freelancing full-time or taking on a few side projects, having a solid invoice template can simplify the process. This article will guide you through understanding what an illustrator invoice is, when to use it, its key components, how to write one step-by-step, and more. Let’s get started!
What is an Illustrator Invoice?
An illustrator invoice is a document that outlines the services you’ve provided as an illustrator and requests payment for those services. It acts as a formal request for payment and includes key details about the project, such as descriptions of the work done, payment terms, and due dates.
When to Use an Illustrator Invoice
You should use an illustrator invoice whenever you complete a project or service for a client. This could range from a one-off illustration to a larger, ongoing project. Even if you have a verbal agreement, it’s always smart to provide an invoice to ensure clarity and professionalism.
Key Components of an Illustrator Invoice
- Your Contact Information: Include your name, business name (if applicable), address, phone number, and email.
- Client’s Contact Information: Make sure to add the client’s name, address, and any relevant contact details.
- Invoice Number and Date: Assign a unique invoice number and the date the invoice is issued.
- Description of Services: Clearly detail the services provided, including project descriptions, hours worked, or specific tasks completed.
- Payment Terms: State the total amount due, payment methods accepted, and the due date.
- Additional Notes: You might want to add any specific notes or terms regarding the project.
Step-by-Step Guide to Writing an Illustrator Invoice
- Choose an Invoice Template: Start with a basic template that you can customize. You can use software like Microsoft Word, Google Docs, or even specialized invoicing tools.
- Add Your Information: Fill in your contact details at the top of the invoice.
- Include Client Information: Add your client’s details just below yours.
- Set an Invoice Number: This helps you and your client keep track of payments.
- Detail Your Services: List the illustrations you created, including any relevant project details. For example: “Logo design for XYZ Company – 10 hours at $50/hour.”
- Calculate the Total: Clearly state the total amount due, and specify how you prefer to be paid.
- Finalize and Send: Review for accuracy, save it as a PDF, and send it to your client via email.
Realistic Examples and Template Snippets
Here’s a simple example of what an illustrator invoice might look like:
Your Name
Your Address
Your City, State, Zip
Your Email
Your Phone Number
Client Name
Client Address
Client City, State, Zip
Invoice #001
Date: [Insert Date]
Description of Services:
– Character design for ABC Game: 15 hours @ $60/hour
– Cover art for XYZ Book: $800
Total Amount Due: $1,300
Payment Terms: Due within 30 days. Pay via PayPal or bank transfer.
Common Mistakes to Avoid
- Not including a unique invoice number, which can lead to confusion.
- Failing to specify payment terms, which can result in delayed payments.
- Leaving out important details about the services rendered.
Tips for Customization
Feel free to customize your invoice template to fit your brand. Use your business logo, choose colors that represent your style, and format the layout to ensure it looks professional. Adding a personal touch can make a difference in how your clients perceive your work.
Creating an illustrator invoice doesn’t have to be a chore. By following these guidelines and using the templates provided, you can streamline your invoicing process and focus more on what you love—illustrating. If you need further examples, you might want to check out event planner invoice samples or freelance developer invoice samples for inspiration.
Template Variations & Sample Formats