As a 3D artist, managing your finances might not be the most thrilling part of your job, but knowing how to create a clear and professional invoice is essential. Using 3D artist invoice templates can streamline this process, helping you get paid faster while ensuring your clients have all the information they need. Let’s explore what these templates are, when to use them, and how to create your own.
WHAT IS A 3D ARTIST INVOICE TEMPLATE?
A 3D artist invoice template is a pre-designed document that simplifies the invoicing process. It includes all the necessary sections and fields to detail the services you’ve provided, the payment terms, and your contact information. With a template, you can focus on your art while ensuring your invoices are professional and consistent.
WHEN TO USE A 3D ARTIST INVOICE TEMPLATE
Whenever you complete a project for a client, it’s time to send an invoice. This could be for freelance work on a video game, architectural visualizations, or product designs. Using a template helps you maintain a professional image and makes the payment process smoother.
KEY COMPONENTS OF A 3D ARTIST INVOICE
Here are some essential sections you should include in your invoice:
- Your Contact Information: Name, address, phone number, and email.
- Client’s Information: Name and contact details of the person or company you’re invoicing.
- Invoice Number: A unique identifier for tracking purposes.
- Date of Issue: The date you are sending the invoice.
- Due Date: When the payment is expected.
- Description of Services: A detailed list of what you’re charging for, including hours worked or specific tasks completed.
- Payment Terms: Specify how you would like to be paid (e.g., bank transfer, PayPal).
- Total Amount Due: Clearly state the total amount the client owes.
STEP-BY-STEP GUIDE TO WRITING AN INVOICE
- Choose a Template: Start with a basic template that suits your style. You can find free options online or create your own.
- Fill in Your Information: Add your name, address, and contact details at the top.
- Add Client Information: Include your client’s name and contact details directly below yours.
- Assign an Invoice Number: This can be a simple sequential number or a combination of numbers and letters.
- List Services: Write a clear description of the services provided, including any relevant details such as project milestones.
- State Payment Terms: Make sure to clarify how and when you expect to be paid.
- Add Total Amount Due: Highlight the total to make it easy for your client to see.
- Review and Send: Double-check all the information for accuracy before sending it to your client.
EXAMPLES OF 3D ARTIST INVOICE TEMPLATES
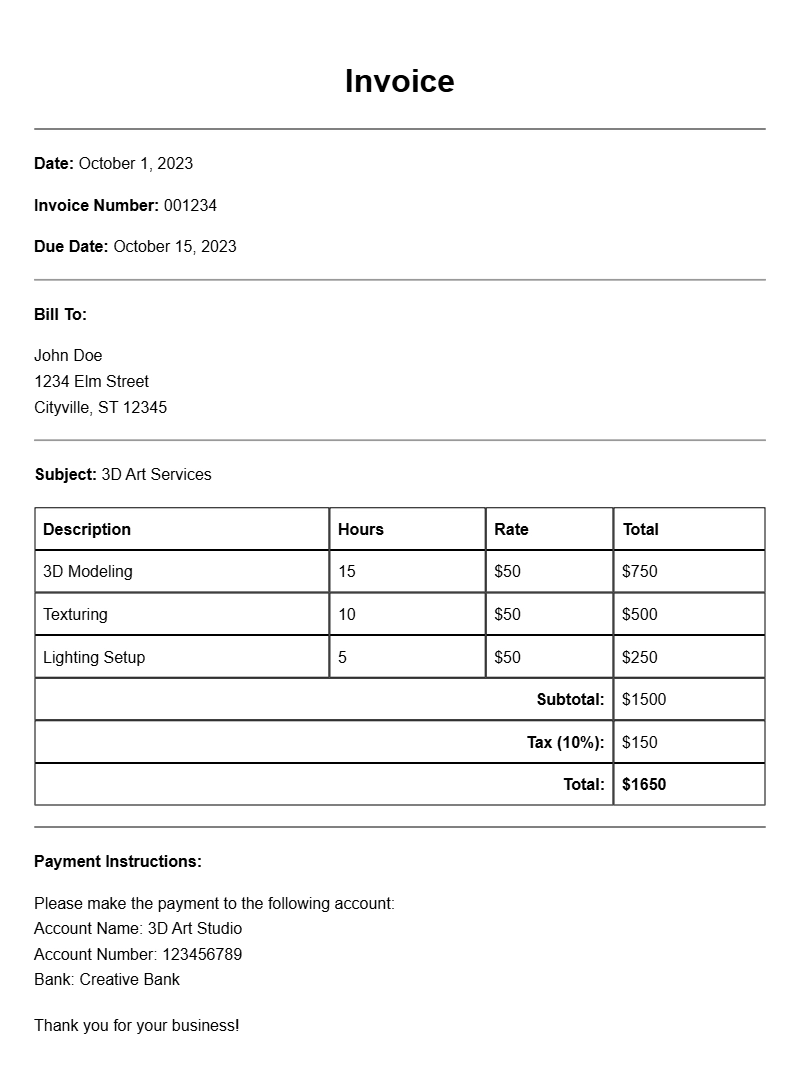
Here’s a simple template snippet you can modify for your own needs:
Your Name
Your Address
Your Phone Number
Your Email
Client Name
Client Address
Invoice Number: 001
Date: [Insert Date]
Due Date: [Insert Due Date]
Description of Services:
– 3D Modeling for Project X: 10 hours @ $50/hour
– Texturing and Lighting: 5 hours @ $50/hour
Total Amount Due: $750
Payment Terms: PayPal or Bank Transfer
COMMON MISTAKES TO AVOID
- Not including an invoice number, which can lead to confusion.
- Forgetting to state clear payment terms, which may delay payment.
- Neglecting to proofread the invoice for errors, which can appear unprofessional.
TIPS FOR CUSTOMIZATION
Personalizing your invoice can make a big difference. Consider adding:
- Your logo to enhance branding.
- Color schemes that match your portfolio or style.
- Links to your portfolio or social media for easy access to your work.
Using a 3D artist invoice template helps streamline your billing process and ensures you get paid on time. Tailor the template to fit your style and the specifics of your projects. This way, you can focus more on what you love — creating stunning 3D art.
Editable Document Format Examples