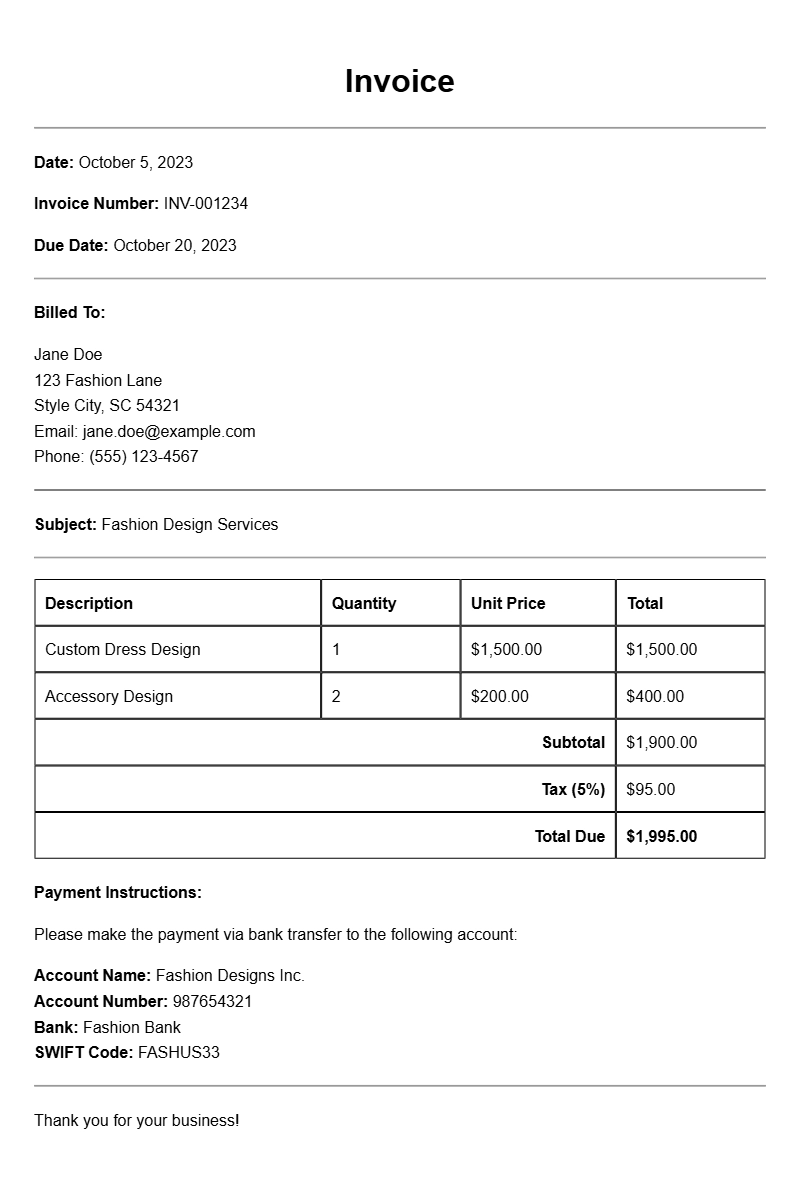
Creating an invoice as a clothing designer can be a straightforward task, but having the right template can make it even easier. In this article, we’ll explore clothing designer invoice samples, what they should include, and how to customize them for your needs. Whether you’re just starting out or looking to refine your invoicing process, this guide aims to help you create clear and professional invoices that get you paid on time.
What is a Clothing Designer Invoice?
A clothing designer invoice is a document that details the services you’ve provided to a client, along with the payment terms. It serves as a formal request for payment and includes all necessary information to ensure that you and your client are on the same page regarding costs and deliverables.
When is it Used?
You typically use an invoice after completing a project or delivering a service. This could be after creating a custom outfit, providing design consultations, or even for wholesale orders. Having a professional invoice helps to clarify the transaction and provides a record for both you and your client.
Key Components of a Clothing Designer Invoice
- Your Business Information: Include your name, address, phone number, and email.
- Client Information: Add the client’s name and contact details.
- Invoice Number: Assign a unique number for tracking purposes.
- Date of Issue: The date you send the invoice.
- Services Rendered: A detailed list of the services provided.
- Total Amount Due: Clearly state the total amount owed.
- Payment Terms: Specify when the payment is due and the accepted payment methods.
Step-by-Step Writing Guide
Follow these steps to create an effective invoice:
- Choose a Template: Start with a template that suits your style. You can find many free or paid templates online tailored for designers.
- Fill in Your Information: Add your business details at the top of the invoice.
- Add Client Information: Include your client’s name and contact info to personalize the document.
- List Your Services: Be specific about what you provided. For example, instead of “design work,” say “custom wedding dress design – 10 hours.”
- Calculate the Total: Add all costs and ensure you double-check the math.
- Set Payment Terms: Include when you expect to be paid and how clients can pay you.
Realistic Examples/Templates
Here’s a simple template snippet you can adapt:
[Your Name]
[Your Address]
[Your Email]
[Your Phone Number]
[Client’s Name]
[Client’s Address]
Invoice No: [#0001]
Date: [MM/DD/YYYY]
Description of Services:
1. Custom Dress Design – 10 hours @ $50/hour = $500
2. Fabric Sourcing – $150
3. Fittings (2 sessions) – $100
Total Due: $750
Payment Terms: Due upon receipt. Accepting PayPal, bank transfer, or check.
Common Mistakes to Avoid
- Not numbering invoices sequentially, which can create confusion.
- Failing to include payment terms, leading to delayed payments.
- Leaving out your contact information, making it hard for clients to reach you.
Tips for Customization
To make your invoice stand out:
- Use your brand colors and logo for a professional look.
- Consider adding a personal message or a thank you note.
- Include links to your portfolio or social media to encourage further engagement.
Creating a clothing designer invoice doesn’t have to be a daunting task. With the right template and a clear understanding of what to include, you can streamline your billing process and maintain professionalism. By following these guidelines, you’ll ensure your invoices are effective, clear, and professional, making it easier for you to get paid promptly. Ready to get started? Check out some additional resources on related invoicing topics like speech therapy invoices or yoga instructor invoices for more inspiration. Happy invoicing!
Standard Format & Layout Reference