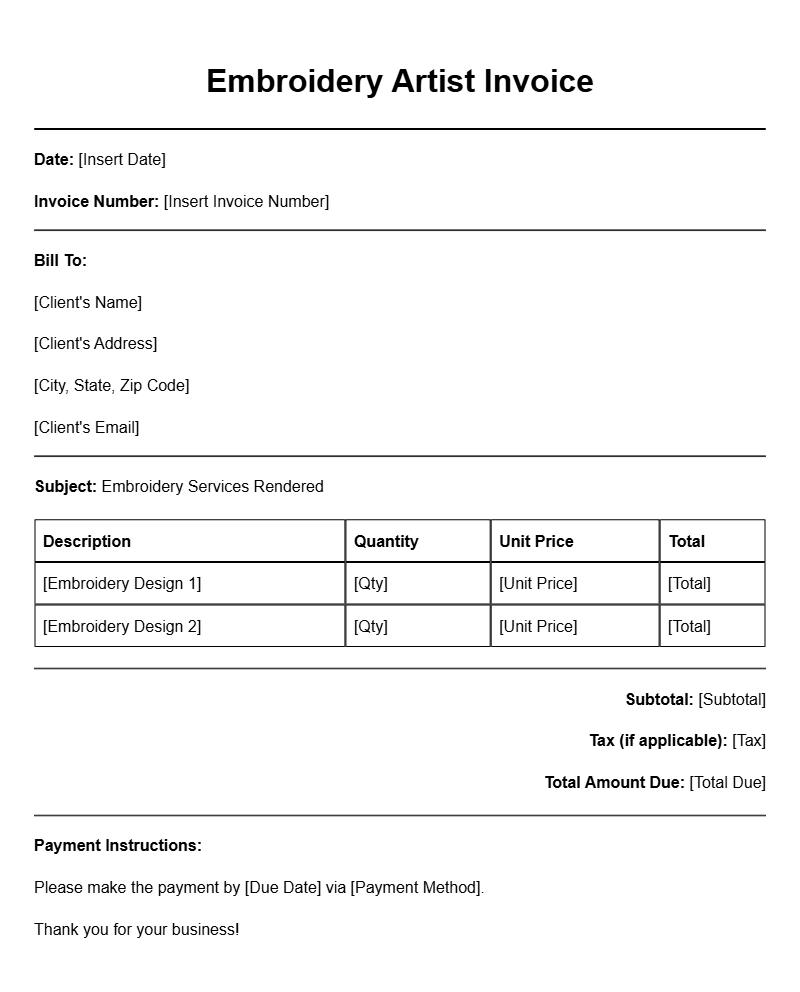
As an embroidery artist, managing your finances can be just as creative as your craft. One essential tool in this process is an invoice template. Having a well-structured invoice can help you get paid on time, maintain professionalism, and keep clear records of your transactions. In this guide, we’ll walk you through everything you need to know about embroidery artist invoice templates.
What is an Embroidery Artist Invoice Template?
An embroidery artist invoice template is a pre-formatted document that helps you itemize the services you provide, the costs associated with them, and the payment terms. It serves as a formal request for payment from your clients, ensuring they understand what they’re paying for and when payment is due.
When is it Used?
You’ll use an invoice template whenever you complete a project for a client. Whether you’re working on custom embroidery for a wedding, logo designs for a business, or any other type of work, sending an invoice is a professional practice. It’s a way to confirm the agreement between you and your client, helping to avoid any misunderstandings about cost or services rendered.
Key Components of an Embroidery Artist Invoice
A well-crafted invoice should include the following key components:
- Your Contact Information: Include your business name, address, phone number, and email.
- Client Information: Clearly state the client’s name and contact details.
- Invoice Number: Assign a unique number to each invoice for tracking and reference.
- Date of Issue: Mention the date when the invoice is created.
- Due Date: Specify when you expect payment to be made.
- Itemized List of Services: Describe the embroidery services provided along with their corresponding costs.
- Total Amount Due: Clearly state the total amount the client needs to pay.
- Payment Terms: Include details on accepted payment methods and any late fees.
Step-by-Step Writing Guide
Creating your invoice can be straightforward if you follow these steps:
- Choose a template that suits your style. You can find free options online or use a word processing program to create your own.
- Fill in your contact information at the top of the document.
- Add your client’s information directly below yours.
- Assign an invoice number and the date of issue.
- List the services you provided, detailing each service and its cost.
- Calculate the total and ensure it’s clearly visible.
- Define your payment terms, including accepted methods and due date.
- Proofread your invoice before sending it out.
Realistic Examples/Templates
Here’s a simple example of what your invoice might look like:
Embroidery by Jane Doe
123 Stitch Lane, Craftsville, CA 12345
Phone: (123) 456-7890
Email: jane@example.com
Invoice #001
Date: March 1, 2023
Due Date: March 15, 2023
Bill To:
Mary Smith
456 Thread Street, Sewtown, CA 54321
Description of Services:
– Custom Embroidery for Wedding Gifts: $200
– Logo Design for ABC Company: $150
Total Amount Due: $350
Payment Terms: Please make payment via bank transfer or PayPal. Late payments may incur a fee of 5% per week.
Common Mistakes to Avoid
While creating your invoice, watch out for these common pitfalls:
- Not including all necessary information, which can delay payments.
- Forgetting to proofread for typos or errors in the total amount.
- Using overly complicated language that can confuse clients.
Tips for Customization
Make your invoice reflect your style and brand by:
- Using your brand colors and logo to create a cohesive look.
- Adding a personal touch, like a thank you note or a small discount for referrals.
- Keeping it simple and easy to read, ensuring that all vital information stands out.
With your embroidery artist invoice template ready, you can focus more on your creativity and less on the hassle of payments. A well-structured invoice not only helps you get paid but also reinforces your professionalism in the eyes of your clients. Don’t forget to check out other invoice templates, like translation service invoices or data analyst invoices, for more inspiration!
Practical Document Examples