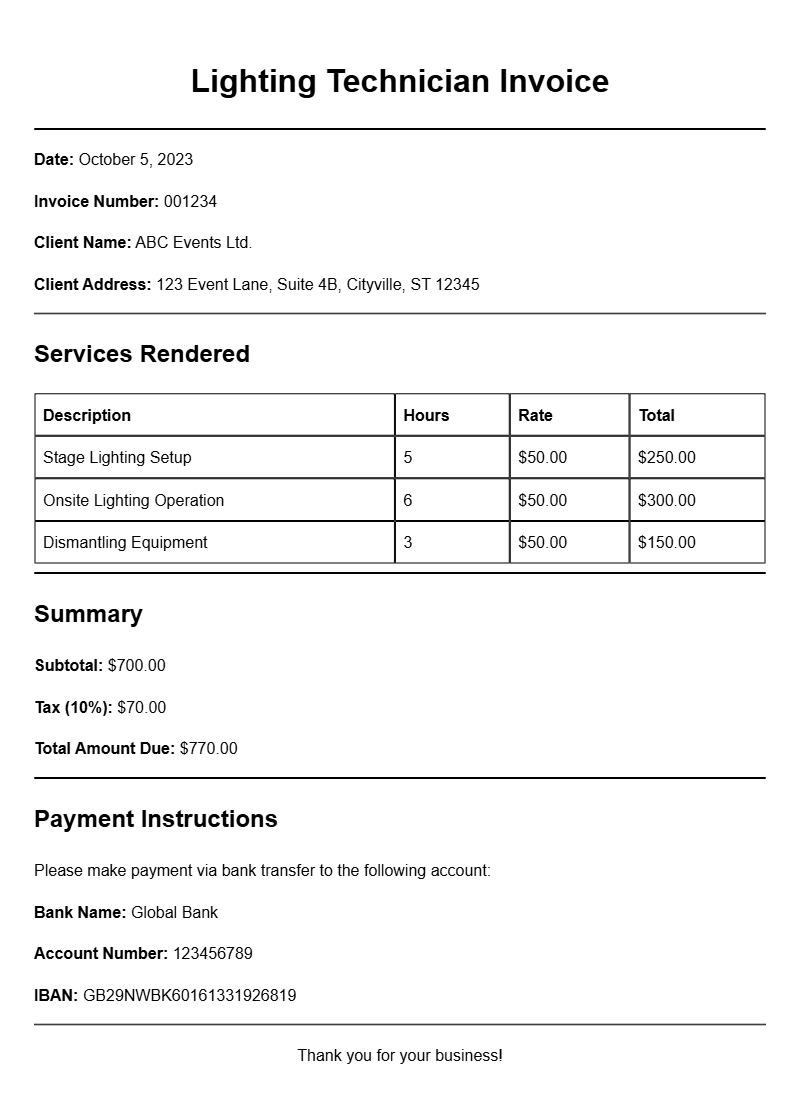
If you’re a lighting technician, you know that getting paid for your services means providing a detailed invoice. However, crafting the perfect invoice can be tricky. This guide will walk you through the essentials of creating lighting technician invoice samples that not only impress your clients but also ensure you get paid on time.
WHAT IS A LIGHTING TECHNICIAN INVOICE?
A lighting technician invoice is a document that outlines the services you provided, the costs associated with those services, and payment terms. It serves as a formal request for payment from your clients and is crucial for record-keeping and tax purposes.
WHEN IS IT USED?
You’ll need to create an invoice after you complete a job, whether it’s for a concert, theater production, or corporate event. It’s your way of detailing what you did, how much it cost, and when the client should pay you.
KEY COMPONENTS OF A LIGHTING TECHNICIAN INVOICE
- Your Business Information: Include your name, address, phone number, and email.
- Client Information: List the client’s name and contact details.
- Invoice Number: Assign a unique number to each invoice for tracking.
- Date of Issue: When you’re sending the invoice.
- Service Description: Detail the services provided, including hours worked and equipment used.
- Costs: Include itemized charges, taxes, and total amount due.
- Payment Terms: Specify when payment is due and acceptable payment methods.
STEP-BY-STEP WRITING GUIDE
Creating your invoice can be straightforward if you follow these steps:
- Start with Your Information: Place your business name and contact details at the top.
- Add Client Details: Right below, clearly state the client’s name and address.
- Include the Invoice Number: This can be generated sequentially. For example, if it’s your 10th invoice, label it as “Invoice #10.”
- Date of Issue: Insert the date you are issuing the invoice.
- Detail the Services: List the services provided, along with a brief description and the hours worked. You might write something like, “Setup and operation of stage lighting for a corporate event on [date].”
- List Costs: Provide a clear breakdown of each charge. For instance, “Lighting equipment rental: $200, Labor (10 hours at $50/hour): $500, Total: $700.”
- Payment Terms: State your payment terms clearly. For example, “Payment is due within 30 days of invoice date.”
REALISTIC EXAMPLES AND TEMPLATES
Here’s a simple invoice template you can customize:
Your Name
Your Address
Your City, State, Zip
Your Email
Your Phone Number
Client Name
Client Address
Client City, State, Zip
Invoice # [Insert Number]
Date of Issue: [Insert Date]
Service Description:
– Lighting setup for [Event Name] on [Event Date]
– Duration: [X hours]
– Equipment used: [List of equipment]
Costs:
– Equipment Rental: $[Amount]
– Labor: $[Amount] (X hours at $[Rate]/hour)
– Total Due: $[Total Amount]
Payment Terms: Payment due within 30 days.
COMMON MISTAKES TO AVOID
- Not including all relevant details, which can lead to misunderstandings.
- Forgetting to number your invoices, making tracking difficult.
- Being unclear about payment terms, which may delay your payment.
TIPS FOR CUSTOMIZATION
Personalize your invoices to reflect your brand. Use your logo, pick a color scheme that matches your business identity, and choose a professional font. You can also include a thank you note or a reminder of your services to keep your clients engaged.
Creating a well-structured invoice is essential for your business as a lighting technician. By following this guide, you can ensure your invoices are clear, professional, and effective at getting you paid. Happy invoicing!
Practical Document Examples