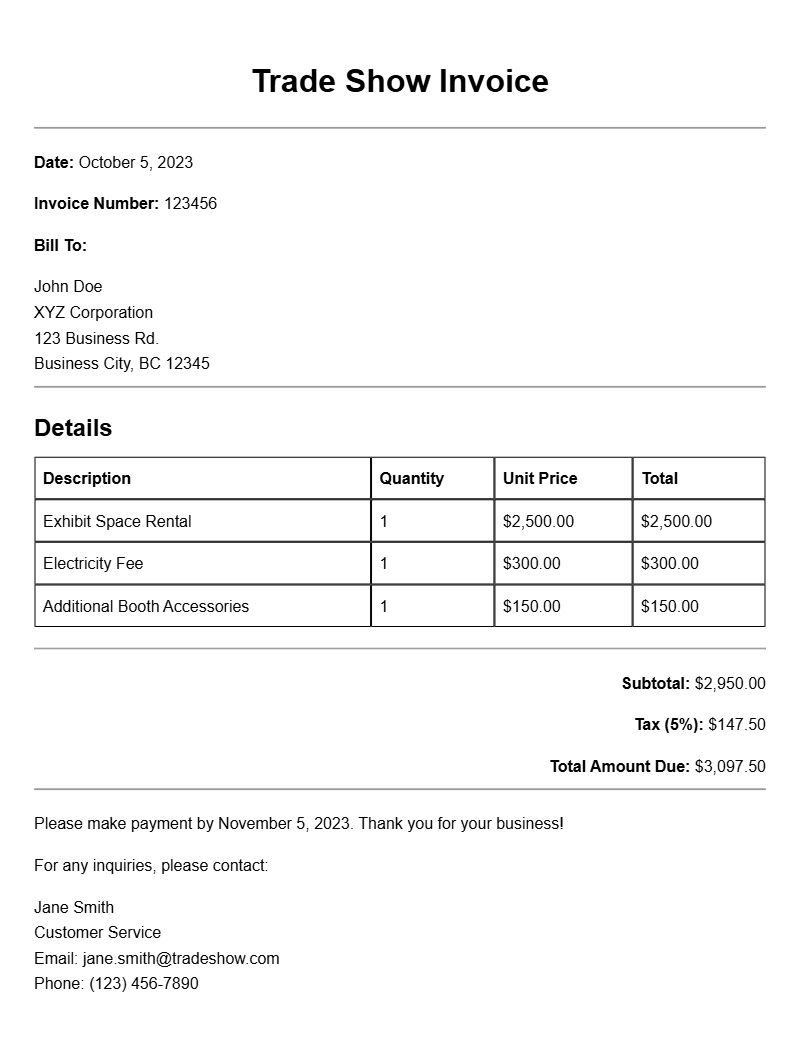
When you’re preparing for a trade show, the last thing you want to worry about is how to keep track of your sales and expenses. That’s where trade show invoice templates come into play. They help streamline your invoicing process, ensuring you get paid promptly while keeping everything organized. Let’s break down what you need to know about these templates, including how to use them effectively.
What is a Trade Show Invoice Template?
A trade show invoice template is a pre-formatted document that you can use to bill clients for products or services sold at a trade show. These templates are designed to save you time and effort, allowing you to focus on engaging with customers rather than stressing over paperwork.
When is it Used?
You typically use a trade show invoice template during or after a trade show when you’ve made sales. Whether you’re selling handmade crafts, promotional items, or services, an invoice helps ensure that both you and your customers have a clear record of the transaction.
Key Components of a Trade Show Invoice
- Your Business Information: Include your business name, address, and contact information.
- Client Information: Add the name and address of the customer or business you’re invoicing.
- Invoice Number: A unique identifier for your invoice to keep track of sales.
- Date of Issue: The date the invoice is created.
- Itemized List of Products/Services: Clearly outline what you’re billing for, including quantities and prices.
- Total Amount Due: Clearly state the total that needs to be paid.
- Payment Terms: Specify how and when you expect to be paid.
Step-by-Step Guide to Writing a Trade Show Invoice
- Choose a Template: Start with a template that suits your business style.
- Fill in Your Information: Add your business name, address, and contact details at the top.
- Add Client Details: Include the customer’s contact information beneath yours.
- Generate an Invoice Number: This can be sequential, such as “001”, “002”, etc.
- List Your Products/Services: Include a description, quantity, and price for each item sold.
- Calculate the Total: Sum up the prices and include any applicable taxes.
- Include Payment Terms: State when payment is due and your accepted payment methods.
- Review and Send: Double-check for accuracy before sending it to your client.
Realistic Examples and Template Snippets
Here’s a simple example of how your trade show invoice might look:
Your Business Name
123 Main Street
City, State, Zip
Email: yourname@example.com
Phone: (123) 456-7890
Invoice #001
Date: [Insert Date]
Bill To:
Client Name
Client Address
City, State, Zip
Itemized List:
– Product A: 3 x $10.00 = $30.00
– Product B: 2 x $15.00 = $30.00
Total Amount Due: $60.00
Payment Terms: Due upon receipt. Accepting cash, credit, or PayPal.
Common Mistakes to Avoid
- Neglecting to include your contact information.
- Forgetting to assign unique invoice numbers.
- Not providing clear payment terms, which can lead to confusion.
- Omitting important details like item descriptions or quantities.
Tips for Customization
Make your invoice stand out by customizing it to reflect your brand. Use your business colors, include a logo, and consider adding a personal touch with a thank-you note or a discount for future purchases. You can check out metal fabricator invoice samples or house painting invoice templates for more ideas.
In a nutshell, having a solid trade show invoice template can make a significant difference in your event experience. It keeps your sales organized and ensures you get paid on time, allowing you to focus on what really matters—connecting with your customers and growing your business.
Document Structure & Example Models