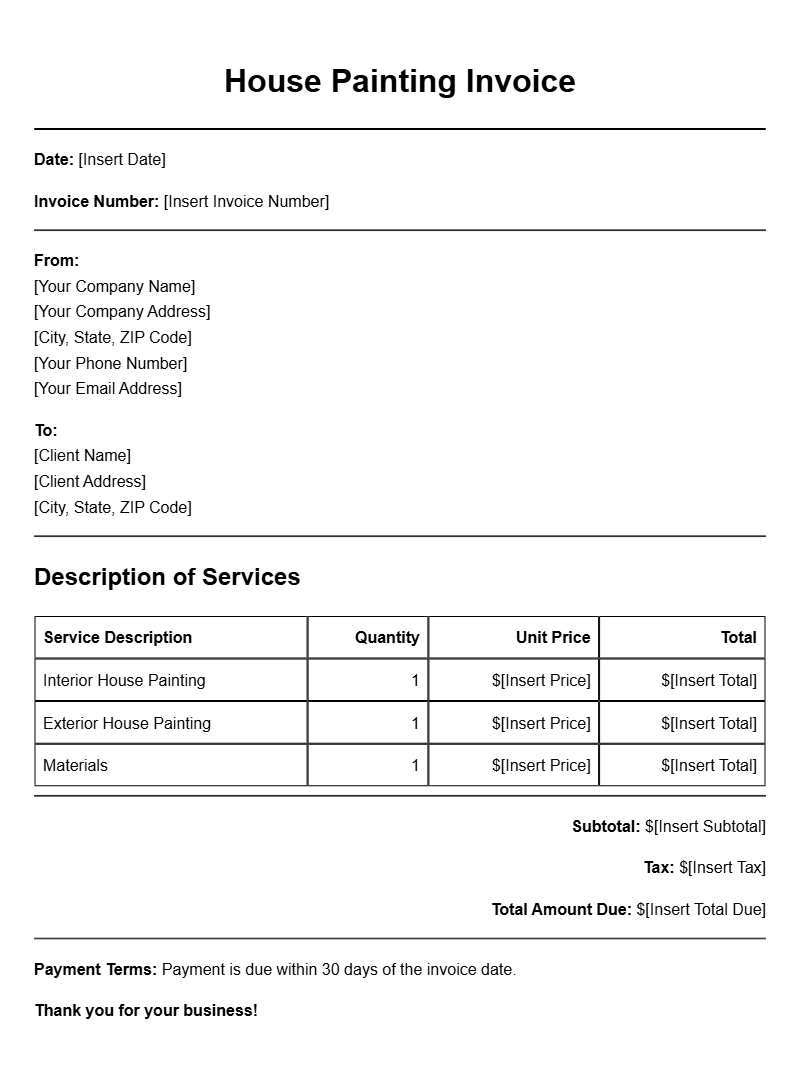
Creating a professional-looking invoice is essential for house painters. An invoice not only helps you get paid but also serves as a record of the services provided. If you’re looking for house painting invoice templates, you’re in the right place. This guide will walk you through the essentials of crafting an effective invoice that suits your needs.
WHAT IS A HOUSE PAINTING INVOICE TEMPLATE?
A house painting invoice template is a pre-designed document that helps you bill your clients for painting services. It typically includes sections for your business information, client details, a list of services provided, costs, and payment terms. Using a template saves you time and ensures you don’t miss any important details.
WHEN TO USE A HOUSE PAINTING INVOICE?
You’ll need to issue an invoice after completing a painting job, whether it’s for a residential home or a commercial space. It’s best practice to send the invoice promptly, usually within a week of project completion. This helps maintain professionalism and speeds up payment processing.
KEY COMPONENTS OF A HOUSE PAINTING INVOICE
- Your Business Name and Contact Information: Include your logo, address, phone number, and email.
- Client Information: Add the client’s name, address, and contact information.
- Invoice Number: A unique number for each invoice helps with tracking.
- Date of Issue: The date you’re sending the invoice.
- Description of Services: A detailed list of what services you provided, such as wall preparation, priming, and painting.
- Costs: Break down the costs for labor, materials, and any additional fees.
- Total Amount Due: Clearly state the total amount your client owes.
- Payment Terms: Specify when the payment is due and acceptable payment methods.
STEP-BY-STEP GUIDE TO WRITING YOUR INVOICE
- Choose a Template: Start with a simple invoice template. You can find many free options online.
- Fill in Your Information: Enter your business name and contact details at the top.
- Add Client Details: Input your client’s information directly below yours.
- Assign an Invoice Number: Make sure each invoice has a unique identifier.
- List Your Services: Be specific about what you did, including measurements and materials used.
- Calculate Costs: Provide a breakdown of costs, making it easy for your client to see how the total was derived.
- State Payment Terms: Include due dates and payment methods.
- Review and Send: Double-check all details for accuracy, then send it off to your client.
EXAMPLE OF A HOUSE PAINTING INVOICE
Here’s a simple invoice template snippet you might use:
Your Business Name
Your Address
Your City, State, Zip
Your Phone Number
Your Email
Invoice #: 001
Date of Issue: [Insert Date]
Bill To:
Client Name
Client Address
Client City, State, Zip
Description of Services:
– Wall Preparation: $200
– Primer Application: $150
– Two Coats of Paint: $400
Subtotal: $750
Tax (if applicable): $50
Total Amount Due: $800
Payment Due: [Insert Due Date]
COMMON MISTAKES TO AVOID
- Not including all relevant details can lead to confusion and payment delays.
- Forgetting to assign a unique invoice number might make tracking payments difficult.
- Neglecting to outline payment terms can create misunderstandings about when funds are expected.
TIPS FOR CUSTOMIZATION
Feel free to customize your invoice template to reflect your brand. You might want to incorporate your colors, fonts, and logo for a personal touch. Additionally, consider adding a short note thanking your client for their business—this can enhance your professional relationship.
Using house painting invoice templates can streamline your billing process and improve your professionalism. By following this guide, you’ll be able to create clear and effective invoices that reflect your quality of work and make it easier for clients to pay you on time.
For more guidance on creating effective documents, check out our other resources, like appliance repair invoice templates and lighting installation invoice templates.
Document Examples & Template Samples