Creating and managing invoices can feel overwhelming, especially for craft instructors who often juggle multiple clients and classes. A well-structured invoice not only ensures you get paid on time but also reflects your professionalism. This guide will walk you through crafting effective invoices with samples you can easily adapt for your needs.
What Is a Craft Instructor Invoice?
A craft instructor invoice is a document that outlines the services provided, the fees associated with those services, and the payment terms. It serves as a formal request for payment and helps keep your finances organized. This invoice is particularly important for freelance instructors who teach workshops, classes, or one-on-one sessions.
When Is It Used?
You’ll use a craft instructor invoice after completing a class or workshop. It’s essential for documenting your earnings and can be needed for tax purposes. Whether you’re teaching knitting, painting, or pottery, issuing an invoice is a standard practice in the creative industry.
Key Components of a Craft Instructor Invoice
- Your Information: Include your name, address, phone number, and email.
- Client Information: Add the name and contact details of the person or organization you are billing.
- Invoice Number: Assign a unique identifier to each invoice for tracking.
- Date of Issue: The date you create the invoice.
- Services Rendered: Clearly list what services were provided, including descriptions and rates.
- Total Amount Due: Clearly state the total amount owed.
- Payment Terms: Specify how and when you expect to be paid.
Step-by-Step Writing Guide
- Start with Your Information: Position this at the top, ideally centered or aligned left.
- Add Client Information: Beneath your details, add the client’s name and contact info.
- Include the Invoice Number: This can be placed prominently to help with record-keeping.
- List the Services: Be specific about what you taught, the duration, and the fee. For example:
- Beginner Knitting Class – $50
- Private Pottery Lesson (2 hours) – $100
- Calculate the Total: Add up your services and any applicable taxes.
- Specify Payment Terms: Detail how you prefer to be paid (e.g., bank transfer, PayPal) and include a due date.
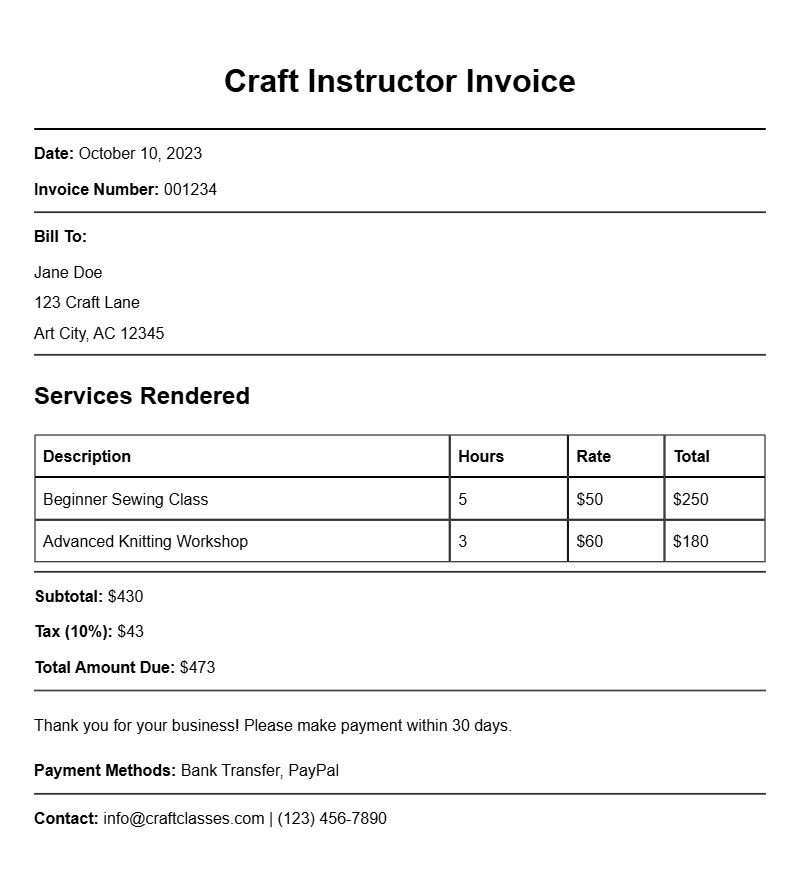
Sample Craft Instructor Invoice
Here’s a simple template you can customize:
Your Name
Your Address
Your Phone
Your Email
Invoice #: 001
Date: [Date]
Bill To:
Client Name
Client Address
Description | Amount
————————- | ——–
Beginner Knitting Class | $50.00
Private Pottery Lesson | $100.00
Total | $150.00
Payment Terms: Due upon receipt. Please make payment via PayPal to [Your PayPal Email].
Common Mistakes to Avoid
- Not being clear: Vague descriptions can lead to confusion. Always specify what the client is paying for.
- Forgetting to number invoices: This helps you track payments and follow up if needed.
- Ignoring payment terms: Be upfront about when you expect to be paid to avoid delays.
Tips for Customization
- Use branding: Include your logo or a unique design that reflects your style.
- Adjust payment methods: Consider what works best for you, whether it’s checks or digital payments.
- Keep it simple: Your invoice should be easy to read and understand at a glance.
Crafting a clear and professional invoice doesn’t have to be daunting. By following these guidelines and using the provided samples, you’ll streamline your billing process and ensure timely payments. For more examples and templates, explore resources like digital marketing invoice templates or video editing invoice templates. Happy teaching and invoicing!
Practical Document Examples