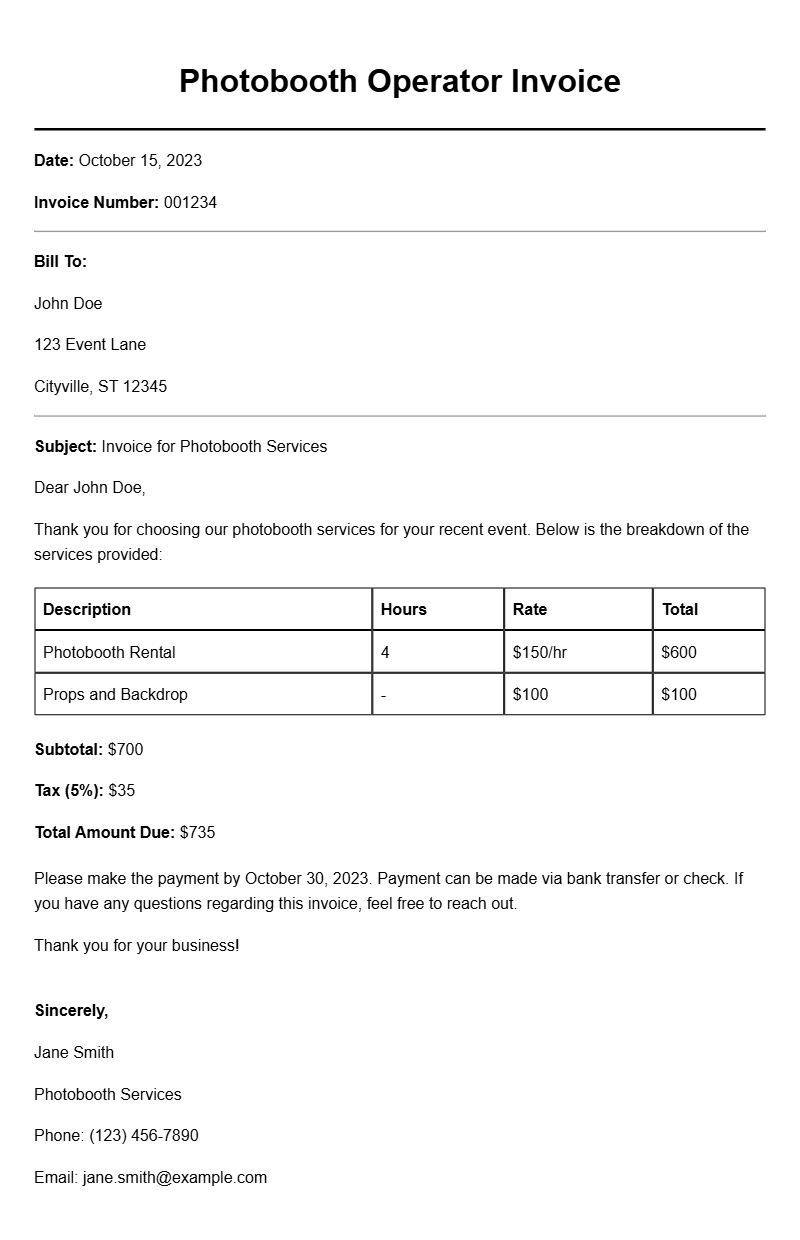
As a photobooth operator, getting paid for your services is essential, and having a well-structured invoice can make that process smoother. An invoice is not just a request for payment; it’s a professional document that outlines the details of your service. If you’re looking for photobooth operator invoice samples, you’re in the right place. This guide will help you understand what an invoice is, when to use it, what to include, and how to create one that reflects your brand.
What is a Photobooth Operator Invoice?
A photobooth operator invoice is a document that specifies the services you provided, the cost of those services, and the payment terms. It’s a professional way to communicate with your clients and ensure you get paid promptly.
When to Use an Invoice
Invoices should be issued after you’ve completed a job or at the end of an event. For instance, if you set up a photobooth for a wedding or corporate event, provide the invoice once the event concludes. This ensures that your clients remember the excellent service you provided and are ready to settle up.
Key Components of an Invoice
- Your Business Information: Include your name, business name, address, phone number, and email.
- Client Information: Add the client’s name and contact details.
- Invoice Number: A unique number for tracking purposes.
- Invoice Date: The date the invoice is issued.
- Due Date: When payment is expected.
- Description of Services: Detail the services provided, such as “Photobooth rental for 4 hours, prints included.”
- Total Amount Due: Clearly state the total cost.
- Payment Terms: Specify accepted payment methods and any late fees, if applicable.
Step-by-Step Writing Guide
Creating an invoice can be straightforward. Here’s a simple process to follow:
- Gather all necessary information: Make sure you have your details and the client’s information handy.
- Choose an invoice template: You can find many free templates online or create one from scratch using a word processor.
- Fill in the invoice components: Use the list above to ensure you don’t miss anything.
- Review for accuracy: Check for correct amounts and spelling.
- Send the invoice: Email the invoice or print it out and hand it to your client.
Realistic Invoice Example
Here’s a simple invoice template you can use:
Your Business Name
Address
City, State ZIP
Phone Number
Email
Invoice Number: 001
Invoice Date: [Date]
Due Date: [Due Date]
Bill To:
Client Name
Client Address
City, State ZIP
Description of Services:
– Photobooth rental for 4 hours: $500
– Extra prints: $100
Total Amount Due: $600
Payment Terms: Payment due within 30 days. Accepting cash, check, or PayPal.
Common Mistakes to Avoid
- Not including an invoice number: This makes tracking payments harder.
- Forgetting to specify payment terms: Clear terms help avoid misunderstandings.
- Omitting client details: Always include who the invoice is for.
- Being unclear in service descriptions: Avoid vague terms; be specific to prevent confusion.
Tips for Customization
Make your invoice reflect your brand by customizing the template with your logo and color scheme. Personalizing your invoices can enhance your professional image. Additionally, consider adding a thank-you note or a small discount for future services to encourage repeat business.
Creating an effective photobooth operator invoice doesn’t have to be daunting. With these tips and examples, you can ensure that your invoices are professional and clear, making it easier for you to get paid on time. For more resources, check out our other articles on stock photographer invoices, mobile mechanic invoices, and designer invoice templates. Happy invoicing!
Sample Documents for Multiple Use Cases