When you’re a designer, keeping your finances organized is just as important as the creative work you do. One effective way to manage your billing is by using designer invoice templates. These templates not only save you time but also help maintain a professional appearance when presenting your work to clients.
What is a Designer Invoice Template?
A designer invoice template is a preformatted document that allows you to itemize your services, list your fees, and request payment from clients. They typically come in various formats, such as Word, Excel, or PDF, and can be easily customized to fit your branding and specific needs. Using a template ensures you include all necessary information and gives your invoice a polished look.
When to Use Designer Invoice Templates
You should use these templates whenever you complete a project for a client. Whether it’s graphic design, web design, or any other creative service, sending an invoice is a standard part of the transaction process. It’s essential to invoice promptly after delivering your work to ensure timely payment.
Key Components of a Designer Invoice
A well-structured invoice typically includes the following sections:
- Your Business Information: Name, address, phone number, and email.
- Client Information: Name and contact details of the client receiving the invoice.
- Invoice Number: A unique identifier for tracking purposes.
- Invoice Date: The date the invoice is issued.
- Due Date: When payment is expected.
- Description of Services: Clear itemization of the services provided.
- Total Amount Due: The total cost including taxes if applicable.
- Payment Instructions: How clients can pay you, including accepted methods.
Step-by-Step Guide to Writing Your Invoice
- Choose a Template: Start with a template that suits your style. You can find various options online or create your own.
- Fill in Your Information: Add your business details at the top of the invoice.
- Add Client Information: Clearly list your client’s name and contact information.
- Assign an Invoice Number: This helps you keep track of your billing.
- Detail Your Services: List each service provided with a description and price.
- Calculate the Total: Ensure all numbers add up correctly.
- Include Payment Information: Specify how and when you would like to be paid.
Realistic Examples of Designer Invoice Templates
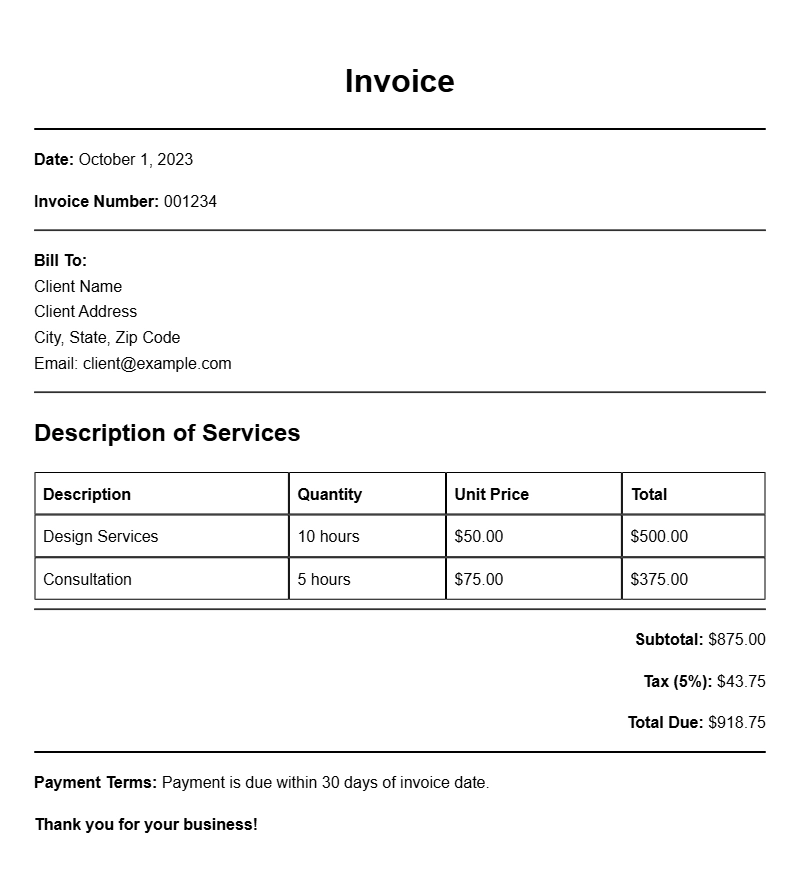
Here’s a simple example of how a designer invoice might look:
Your Business Name
Your Address
Your City, State, Zip
Your Email | Your Phone Number
Invoice Number: 001
Invoice Date: [Date]
Due Date: [Due Date]
Client Name
Client Address
Client City, State, Zip
Description of Services:
– Logo Design: $300
– Business Card Design: $150
Total Amount Due: $450
Payment Instructions: Please make payment via bank transfer or PayPal.
Common Mistakes to Avoid
- Inaccurate Information: Double-check all details to avoid confusion.
- Missing Sections: Ensure every key component is included to prevent delays in payment.
- Unclear Payment Terms: Make your payment instructions clear to avoid any misunderstandings.
Tips for Customization
Make your invoices reflect your personal brand:
- Use your brand colors and fonts to create a cohesive look.
- Add your logo to make it instantly recognizable.
- Consider including a personal note thanking your client for their business.
Using designer invoice templates simplifies the billing process and helps maintain professionalism. By customizing your invoices and including the right information, you can ensure a smooth transaction for both you and your clients. For more specialized templates, check out options tailored for different services like barber services, editing services, or video production.
Document Examples & Template Samples