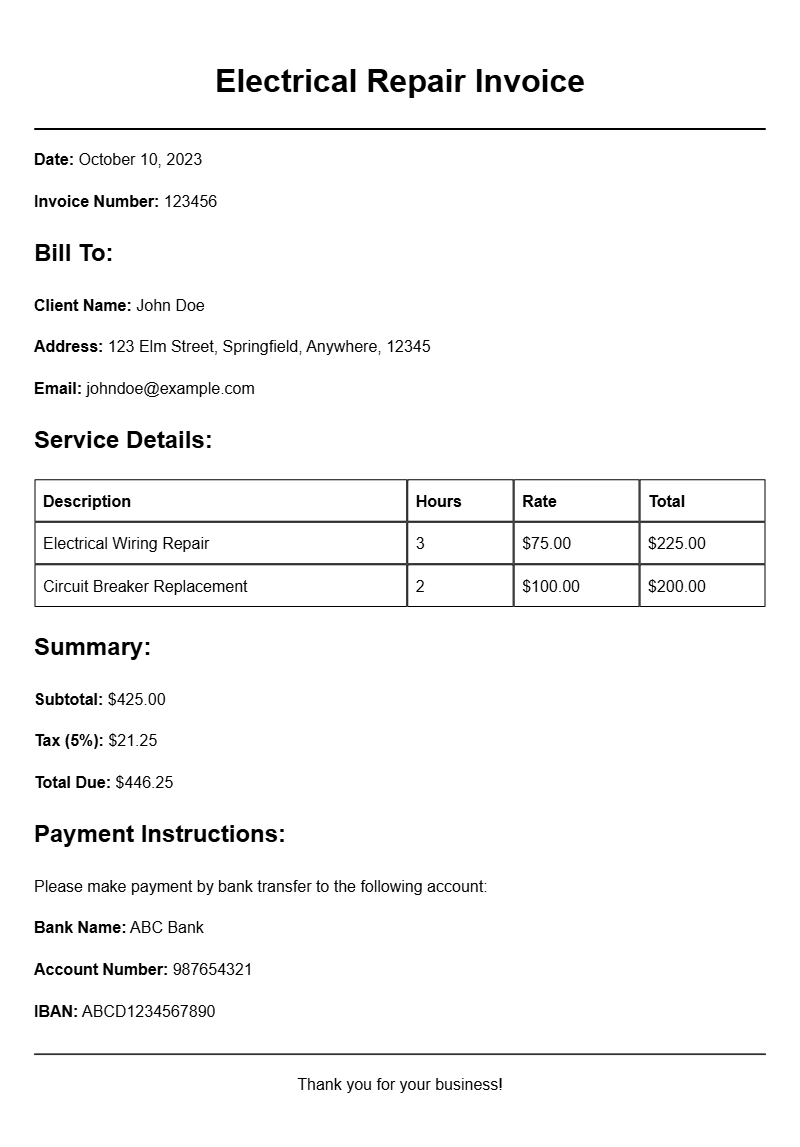
Creating an electrical repair invoice can feel overwhelming, especially if you’re new to the business or just looking to streamline your process. An invoice is more than just a request for payment; it serves as a formal record of the services provided, helping both you and your client stay organized. This guide will walk you through the essentials of crafting effective electrical repair invoices, complete with practical examples and tips.
WHAT IS AN ELECTRICAL REPAIR INVOICE?
An electrical repair invoice is a document that details services rendered by an electrician, including the costs associated with labor, parts, and any additional fees. It’s an essential part of running a business, ensuring clarity for both you and your clients regarding what has been completed and what is owed.
WHEN IS IT USED?
You’ll use an electrical repair invoice after completing a job. It’s your way of formally notifying the client of the total amount due and the specifics of the services provided. Whether it’s a minor repair or a large installation, having a well-structured invoice can improve your professionalism and prompt payment.
KEY COMPONENTS OF AN ELECTRICAL REPAIR INVOICE
- Contact Information: Your name, business name, address, phone number, and email, along with the client’s details.
- Invoice Number: A unique identifier for tracking purposes.
- Date of Service: The date when the work was completed.
- Description of Services: A detailed list of the work performed, including any parts used.
- Cost Breakdown: Itemized costs for labor and materials, along with any applicable taxes.
- Total Amount Due: The final amount the client needs to pay.
- Payment Terms: Specify when payment is due and acceptable payment methods.
STEP-BY-STEP WRITING GUIDE
Follow these steps to create a clear and professional invoice:
- Start with Your Information: Place your name and contact details at the top, followed by the client’s information.
- Assign an Invoice Number: This makes tracking easier for both parties.
- Detail the Services Provided: Clearly describe each service performed, including any parts that were installed or repaired.
- List the Costs: Itemize labor and materials separately to enhance transparency.
- Add Payment Terms: Let your client know how and when to pay.
REALISTIC EXAMPLES AND TEMPLATES
Here’s a simple template you can modify for your needs:
Your Business Name
Your Address
City, State, Zip
Phone Number
Email Address
Invoice To:
Client’s Name
Client’s Address
City, State, Zip
Invoice Number: 001
Date: [Date of Service]
Description of Services:
– Replaced faulty circuit breaker: $150
– Installed new outlet: $75
– Labor (2 hours): $100
Subtotal: $325
Tax (8%): $26
Total Amount Due: $351
Payment Terms: Due within 30 days. Acceptable methods: Check, Credit Card, PayPal.
COMMON MISTAKES TO AVOID
- Not itemizing costs clearly, which can lead to confusion.
- Forgetting to include payment terms, leaving clients unsure about when to pay.
- Using vague descriptions for services, making it difficult for clients to understand what they are being charged for.
TIPS FOR CUSTOMIZATION
Make your invoices stand out and reflect your brand by personalizing them:
- Use your business logo at the top of the invoice.
- Choose colors and fonts that align with your brand identity.
- Adjust the layout to fit your style, but ensure it remains clear and professional.
Incorporating these elements into your electrical repair invoices can help you maintain professionalism and foster trust with your clients. Take the time to create a template that works for you and your business. Once you have a solid foundation, you can easily adapt it for different jobs and clients.
Practical Document Examples