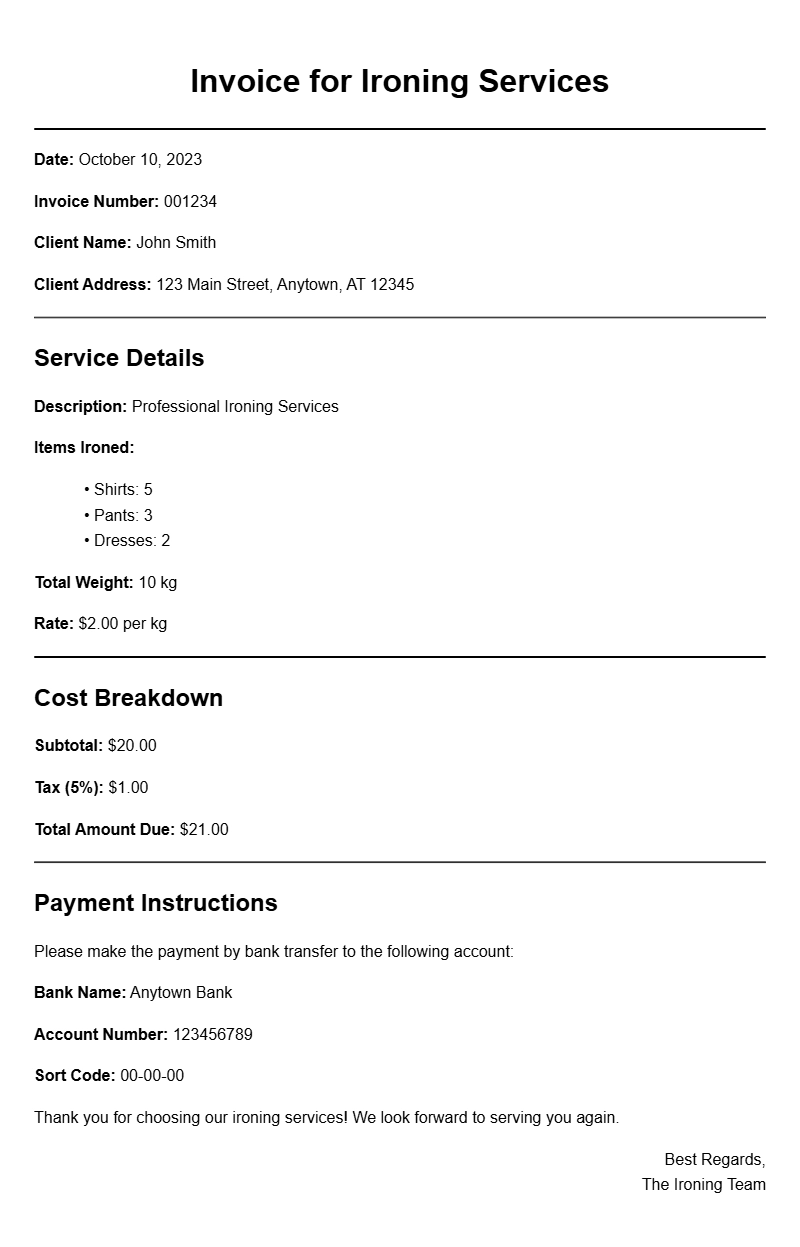
Creating an invoice for your ironing service can feel overwhelming, especially if you’re not sure where to start. Whether you’re a small business owner or offering your services as a side gig, having a clear and professional invoice is essential for getting paid on time. This guide will walk you through what an ironing service invoice is, when to use it, its key components, and how to craft one that meets your specific needs.
WHAT IS AN IRONING SERVICE INVOICE?
An ironing service invoice is a document that outlines the services you provided, the costs associated with those services, and payment terms. It serves as a formal request for payment and can help keep your financial records organized. This document not only reinforces your professionalism but also provides your clients with a clear understanding of what they are paying for.
WHEN IS IT USED?
You should use an ironing service invoice anytime you complete a job for a client. This can include:
- Regular ironing services for a client’s weekly laundry.
- One-time services for special events, like weddings or parties.
- Bulk ironing for businesses that need uniforms or linens pressed.
KEY COMPONENTS OR SECTIONS
A well-structured ironing service invoice typically includes the following sections:
- Your Business Information: Include your name, address, phone number, and email.
- Client Information: The client’s name and contact details.
- Invoice Number: A unique identifier for tracking purposes.
- Date of Service: When the ironing was completed.
- Service Description: Details of the services provided, like the number of items ironed.
- Cost: Prices for each service, including any applicable taxes.
- Payment Terms: Due date and accepted payment methods.
STEP-BY-STEP WRITING GUIDE
Here’s how to create your ironing service invoice:
- Start with your business information at the top, formatted clearly.
- Next, add the client’s information, ensuring you have the correct details.
- Include a unique invoice number to help both you and your client keep track of payments.
- List the date you completed the service.
- Detail the services provided. Be specific about what each charge includes.
- Clearly state the total amount due, breaking down costs if necessary.
- Finish with your payment terms to avoid confusion later.
REALISTIC EXAMPLES/TEMPLATES
Here’s a simple example of an ironing service invoice:
Your Business Name
Your Address
Your Phone Number
Your Email
Client Name
Client Address
Invoice Number: 001
Date of Service: [Insert Date]
Description of Services:
– Ironing of 20 shirts: $50
– Ironing of 10 pairs of trousers: $30
Total Amount Due: $80
Payment Terms: Due within 14 days. Payments accepted via cash or bank transfer.
COMMON MISTAKES TO AVOID
When crafting your invoice, be mindful of these common pitfalls:
- Omitting your business information, which can lead to confusion.
- Not numbering invoices sequentially, making tracking difficult.
- Failing to specify payment terms, resulting in delayed payments.
TIPS FOR CUSTOMIZATION
To make your ironing service invoice more effective, consider these customization ideas:
- Add your logo for branding.
- Include a thank-you note or a small discount for repeat customers.
- Use a professional template to ensure consistency.
Having a clear and detailed ironing service invoice can significantly improve your business’s cash flow. By following the guidelines and examples provided, you can create an invoice that not only looks professional but also helps you maintain strong relationships with your clients. If you’re also in need of templates for other services, consider checking out the resources for carpenter invoices, dog groomer invoices, brewery owner invoices, paving contractor invoices, or plumber invoices.
Document Structure & Example Models