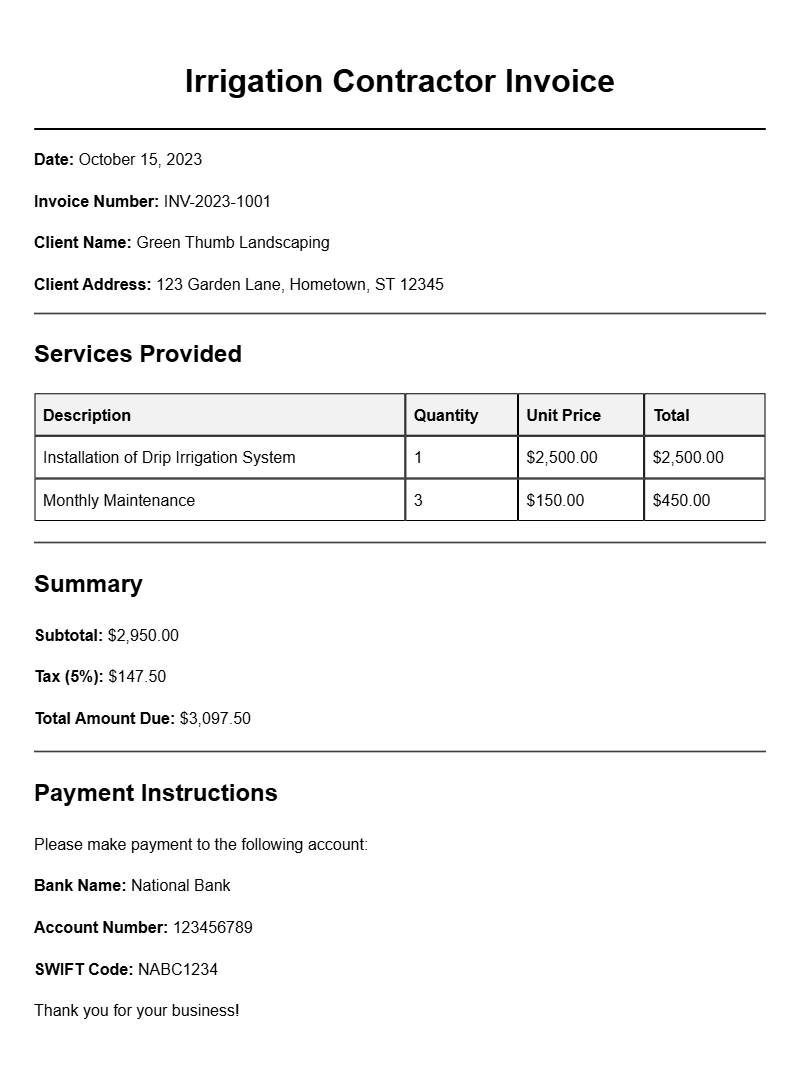
Creating an invoice as an irrigation contractor can seem daunting, especially if you’re unsure what to include. An effective invoice not only helps you get paid on time but also serves as a record of the work completed. Let’s break down what makes a solid irrigation contractor invoice, when to use it, and how to tailor it to fit your needs.
WHAT IS AN IRRIGATION CONTRACTOR INVOICE?
An irrigation contractor invoice is a document that outlines the services provided, materials used, and payment details for irrigation work completed. It’s essential for both the contractor and the client, as it provides a clear summary of what was done and what is owed.
WHEN IS IT USED?
This type of invoice is typically used after the completion of a project or at agreed-upon milestones for larger jobs. If you’ve installed a new irrigation system, repaired existing components, or performed maintenance, it’s time to send out your invoice.
KEY COMPONENTS OF AN IRRIGATION CONTRACTOR INVOICE
- Your Business Information: Include your name, address, phone number, and email.
- Client Information: Add the client’s name and contact details.
- Invoice Number: A unique identifier for tracking purposes.
- Invoice Date: The date the invoice is issued.
- Due Date: When payment is expected.
- Service Description: A breakdown of services rendered, including dates and details.
- Costs: Clearly list the costs for labor, materials, and any additional fees.
- Total Amount Due: The final amount the client needs to pay.
- Payment Instructions: How and where the client can submit payment.
STEP-BY-STEP WRITING GUIDE
- Gather Information: Collect all relevant details about the project, including service dates and materials used.
- Choose a Template: Use a simple template to ensure all components are included. You can find irrigation contractor invoice samples online for inspiration.
- Fill in Your Business Info: Start with your contact information at the top.
- Add Client Details: Include the client’s information directly below yours.
- List Services Provided: Describe each service clearly, noting the time and materials involved.
- Calculate Costs: Sum up all costs associated with the project.
- Include Payment Details: Specify how the client can pay you—whether by check, bank transfer, or another method.
REALISTIC EXAMPLES AND TEMPLATES
Here’s a simple template snippet to get you started:
Your Business Name
Your Address
City, State, Zip
Phone Number
Email
Client Name
Client Address
City, State, Zip
Invoice Number: 001
Invoice Date: [Insert Date]
Due Date: [Insert Due Date]
Description of Services:
– Installed a new drip irrigation system: $1,500
– Repaired sprinklers: $300
Total Amount Due: $1,800
Payment Instructions: Please make checks payable to Your Business Name. Payment can also be made via bank transfer to [Insert Bank Details].
COMMON MISTAKES TO AVOID
- Not including a unique invoice number, which can complicate tracking.
- Failing to specify payment terms clearly, leading to confusion.
- Omitting detailed descriptions of services, which may lead to disputes.
TIPS FOR CUSTOMIZATION
Make the invoice personal to your business by adding your logo or branding. Adjust the layout to match your style, but keep it professional. You might also consider adding a note of thanks for the client’s business, which can enhance customer relationships.
Creating an effective irrigation contractor invoice doesn’t have to be complicated. By following these steps and using the right components, you’ll ensure clear communication with your clients and streamline your payment process. With a well-crafted invoice, you can focus more on what you do best—providing excellent irrigation services.
Standard Format & Layout Reference