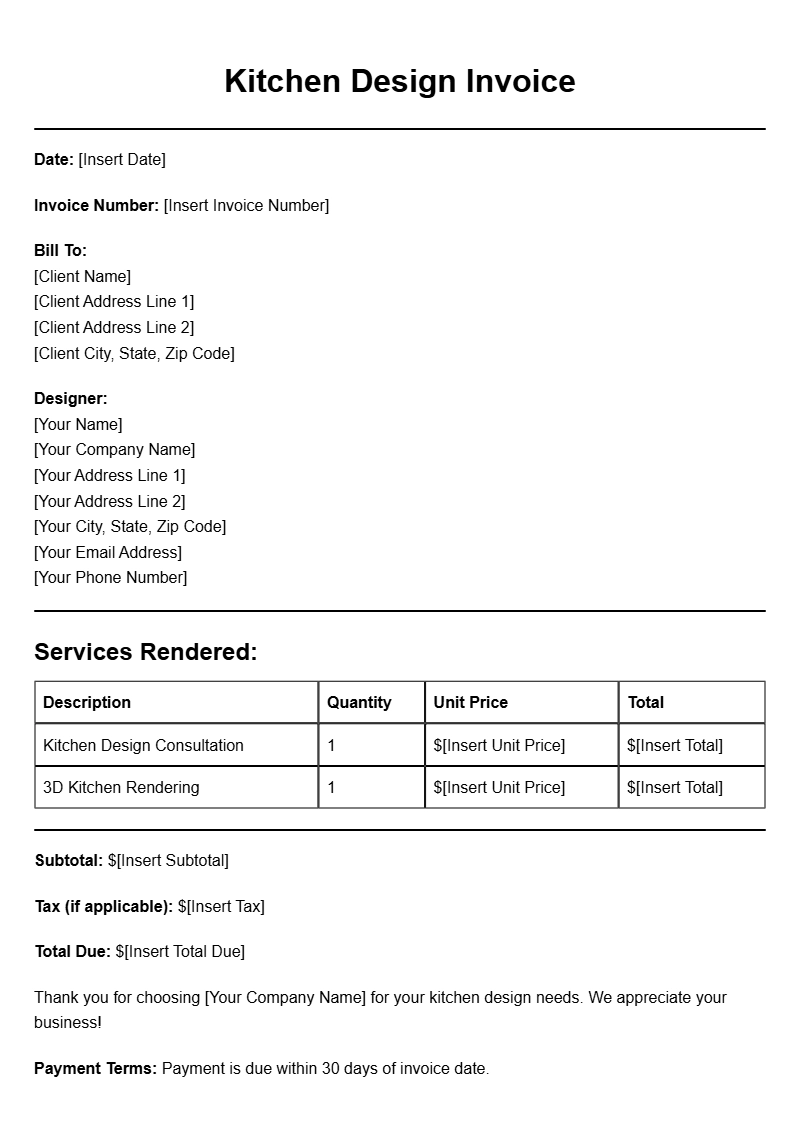
Creating a clear and professional invoice is crucial for kitchen designers. It not only helps you get paid on time but also enhances your brand image. If you’re looking for kitchen designer invoice templates, you’re in the right place. Let’s explore what these templates are, when you should use them, and how to craft an effective invoice.
WHAT IS A KITCHEN DESIGNER INVOICE TEMPLATE?
A kitchen designer invoice template is a pre-formatted document that helps you bill clients for your design services. It includes essential details like services rendered, cost, payment terms, and contact information. Using a template saves you time and ensures consistency in your invoicing process.
WHEN IS IT USED?
You’ll use an invoice template after completing a project or when you reach a specific milestone in a larger project. It’s your formal request for payment, whether you’re working on a full kitchen remodel or providing design consultations. Sending an invoice promptly also helps maintain a professional relationship with your clients.
KEY COMPONENTS OF A KITCHEN DESIGNER INVOICE
- Your Business Information: Include your business name, address, phone number, and email.
- Client Information: Add the client’s name, address, and contact details.
- Invoice Number: Assign a unique number to each invoice for tracking purposes.
- Invoice Date: Clearly state when the invoice is issued.
- Payment Due Date: Specify when payment is expected.
- Description of Services: Detail the services provided, including any materials or products used.
- Cost Breakdown: List costs for each service and provide a total amount due.
- Payment Instructions: Include details on how clients can pay, whether via bank transfer, credit card, or other methods.
STEP-BY-STEP WRITING GUIDE
- Start with Your Information: At the top, clearly state your business name and contact details.
- Add Client Details: Below your information, include the client’s name and contact info.
- Include Invoice Number and Date: This helps with organization and tracking.
- List Services Provided: Be specific about what you did. For example, “Kitchen layout design” or “Cabinet selection.”
- Detail Costs: Break down the costs clearly to avoid confusion. For example:
- Kitchen Design Consultation: $150
- 3D Renderings: $300
- Material Selection: $100
- State Total Amount Due: Make sure this stands out.
- Include Payment Terms: Specify how and when you want to be paid.
REALISTIC EXAMPLES OF INVOICE TEMPLATES
Here’s a simple example of what your invoice might look like:
YOUR BUSINESS NAME
123 Main St, City, State, ZIP
(123) 456-7890 | email@example.com
Invoice #: 001
Invoice Date: MM/DD/YYYY
Due Date: MM/DD/YYYY
Bill To:
Client Name
456 Client Rd, City, State, ZIP
Description of Services:
– Kitchen Design Consultation: $150
– 3D Renderings: $300
– Material Selection: $100
Total Amount Due: $550
Payment Instructions: Please make the payment via bank transfer to Account Number: 12345678.
COMMON MISTAKES TO AVOID
- Neglecting Details: Always double-check that all information is accurate and complete.
- Using Unclear Language: Avoid jargon or vague terms. Be precise in your descriptions.
- Forgetting to Follow Up: If payment isn’t received by the due date, it’s okay to send a gentle reminder.
TIPS FOR CUSTOMIZATION
While templates are handy, don’t hesitate to customize them to fit your style. Consider the following:
- Add your logo for branding.
- Choose colors that reflect your brand.
- Include a personal note or thank you message to enhance client relationships.
Creating a professional invoice doesn’t have to be daunting. With a solid template and a clear understanding of what to include, you can streamline your billing process. For more resources, check out our examples of camping trip invoices, editing service invoices, and telemarketer invoice templates. Happy designing and invoicing!
Document Structure & Example Models