Creating a seminar invoice can feel overwhelming, especially when you want to ensure everything is accurate and professional. Whether you’re running a workshop, training session, or conference, having a well-structured invoice template can save you time and hassle. Let’s break down what you need to know about seminar invoice templates so you can get it right the first time.
WHAT IS A SEMINAR INVOICE TEMPLATE?
A seminar invoice template is a pre-designed document that helps you bill participants for attending your seminar. It outlines the services provided, the amount due, and payment instructions. This template not only serves as a formal request for payment but also provides a record of the transaction for both you and your attendees.
WHEN IS IT USED?
You’ll use a seminar invoice template whenever you conduct a seminar or workshop that requires payment from attendees. It’s essential for tracking income and keeping your finances organized. Whether it’s a one-off event or part of a series, having this template ready streamlines the billing process.
KEY COMPONENTS OF A SEMINAR INVOICE
- Header: Your business name, logo, and contact information.
- Invoice Number: A unique identifier for tracking purposes.
- Date: The date the invoice is issued.
- Recipient Information: Name and contact details of the attendee or organization.
- Description of Services: Details about the seminar, including dates and topics covered.
- Payment Details: Total amount due, payment methods accepted, and due date.
- Terms and Conditions: Any relevant policies, such as cancellation or refund policies.
STEP-BY-STEP WRITING GUIDE
- Choose a Template: Start with a clean, professional-looking template that suits your style.
- Fill in Your Details: Include your business name, logo, and contact information at the top.
- Assign an Invoice Number: This helps you keep track of invoices easily.
- Date It: Always include the date of issue.
- Add Recipient Information: Clearly state who the invoice is for.
- Detail the Services: Describe the seminar, including key topics and dates.
- Calculate the Total: Make sure to include any taxes and discounts.
- Include Payment Instructions: Specify how and when you want to be paid.
- Review and Send: Double-check for accuracy before sending it out.
REALISTIC EXAMPLES AND TEMPLATES
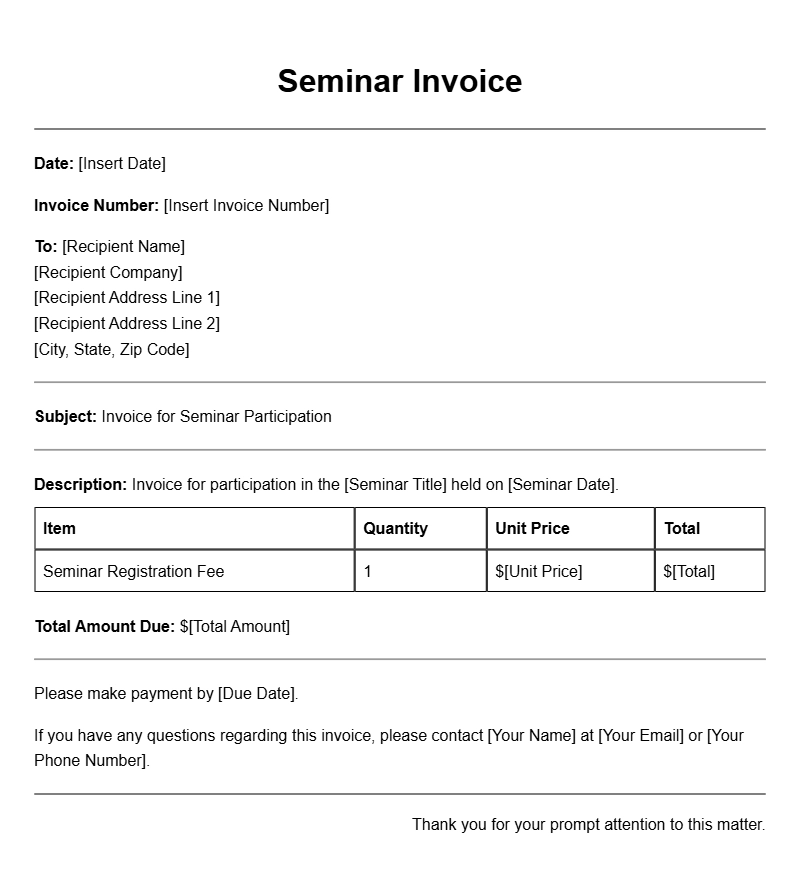
Here’s a simple example of what a seminar invoice might look like:
[Your Business Name]
[Your Logo]
[Your Address]
[Your Phone Number]
[Your Email]
Invoice Number: 001
Date: [Insert Date]
Bill To:
[Recipient Name]
[Recipient Address]
[Recipient Email]
Description of Services:
– Seminar Title: [Title of the Seminar]
– Date: [Date of the Seminar]
– Location: [Location of the Seminar]
– Total Attendees: [Number of Attendees]
Amount Due: $[Total Amount]
Payment Instructions:
Please make payment by [Due Date] via [Payment Method].
Terms and Conditions:
All payments are non-refundable unless the seminar is canceled.
COMMON MISTAKES TO AVOID
- Forgetting to Include Details: Missing out on essential information can lead to confusion.
- Incorrect Calculations: Double-check your math to avoid billing issues.
- Not Following Up: If payment isn’t received by the due date, reach out politely to inquire.
TIPS FOR CUSTOMIZATION
- Branding: Customize the template with your brand colors and fonts.
- Personal Touch: Add a note of appreciation or a personal message to engage your attendees.
- Flexibility: Modify the template based on the type of seminar or audience you’re addressing.
By creating a clear and organized seminar invoice using these guidelines, you can ensure that your billing process is smooth and professional. Don’t hesitate to tweak the template to fit your specific needs. If you’re looking for other invoice types, check out examples like shipping invoices or training course invoices to get more ideas.
Template Variations & Sample Formats