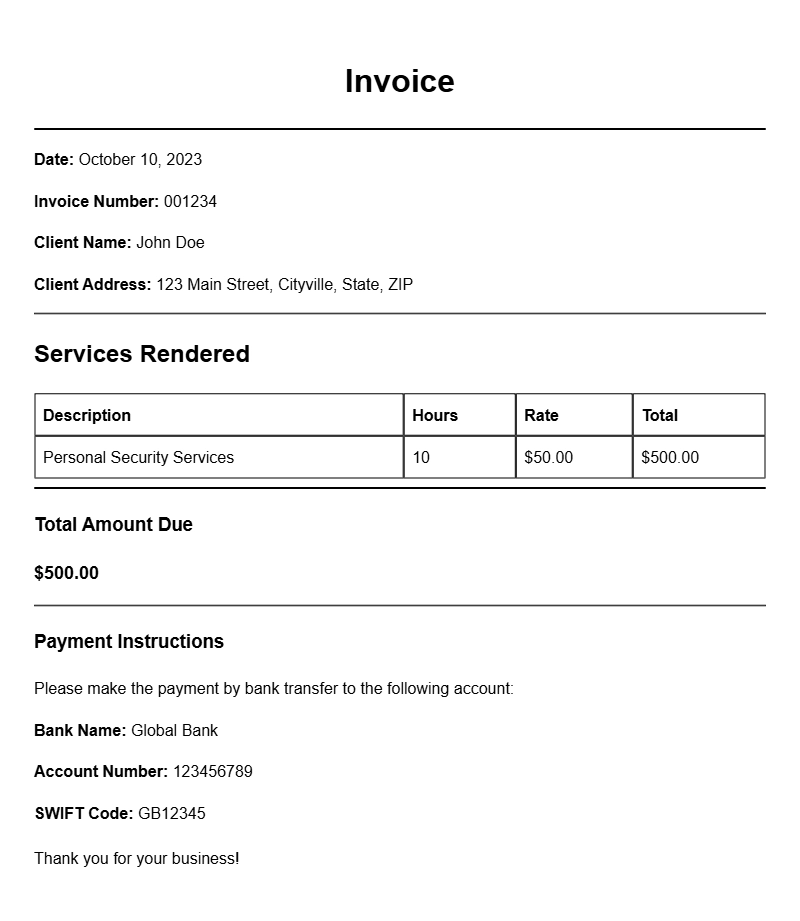
Creating an invoice for bodyguard services can feel overwhelming, especially if you’re just getting started in the personal security industry. You want to ensure that your billing reflects professionalism while clearly communicating the details of the services provided. Here’s a straightforward guide to help you understand bodyguard invoice samples, what they include, and how to create your own.
WHAT IS A BODYGUARD INVOICE?
A bodyguard invoice is a document that outlines the services provided by a bodyguard along with the associated costs. It serves as a formal request for payment from the client and helps maintain accurate financial records. This invoice is crucial for freelancers and small security businesses that need to detail their services and ensure timely payment.
WHEN IS IT USED?
This type of invoice is typically used after a bodyguard has completed a job or a series of assignments. Whether you provided security for a high-profile event, a corporate function, or personal protection for an individual, having an invoice ready helps you get paid efficiently. It’s also useful for tracking your services and income over time.
KEY COMPONENTS OF A BODYGUARD INVOICE
Your invoice should be clear and professional. Here are the essential sections to include:
- Your Business Information: Include your name, address, phone number, and email.
- Client Information: Clearly state the client’s name and contact details.
- Invoice Number: Assign a unique number for easy reference.
- Invoice Date: The date you’re sending the invoice.
- Description of Services: Detail the services provided, including dates and locations.
- Payment Terms: Specify when payment is due and accepted payment methods.
- Total Amount Due: Clearly state the total cost.
HOW TO WRITE A BODYGUARD INVOICE: STEP-BY-STEP GUIDE
Creating your invoice doesn’t have to be complicated. Follow these simple steps:
- Choose a Template: Start with a pre-made template that suits your style. You can find various bodyguard invoice samples online.
- Fill in Your Information: Add your business details at the top of the invoice.
- Add Client Details: Include the client’s information underneath your own.
- List Services: Clearly outline what services you provided. Be specific about the date, location, and type of protection offered.
- Calculate Costs: Break down the costs for each service, if applicable, and provide a subtotal.
- Include Payment Instructions: Specify how and when you expect to be paid.
- Review and Send: Double-check your invoice for accuracy before sending it to your client.
EXAMPLES OF BODYGUARD INVOICE SAMPLES
Here’s a simplified example of what a bodyguard invoice might look like:
Your Name
Your Address
City, State, Zip
Phone: (123) 456-7890
Email: your@email.com
Invoice Number: 001
Invoice Date: [Date]
Client Name
Client Address
City, State, Zip
Description of Services:
– Personal protection for [Client Name] on [Date] at [Location]
– Duration: 8 hours
– Rate: $50/hour
– Total: $400
Payment Terms: Due upon receipt. Pay via bank transfer or check.
Total Amount Due: $400
COMMON MISTAKES TO AVOID
When crafting your bodyguard invoice, keep these common pitfalls in mind:
- Not including all necessary details – make sure to cover everything from services to payment terms.
- Using a confusing format that makes it difficult for clients to understand. Clarity is key.
- Forgetting to number invoices consecutively, which can lead to tracking issues.
TIPS FOR CUSTOMIZATION
Make your invoice stand out by adding personal touches:
- Use your business logo for branding.
- Choose a color scheme that reflects your business style.
- Consider including a brief note thanking the client for their business.
Creating a bodyguard invoice doesn’t have to be a daunting task. By following this guide and utilizing available templates, you can ensure your invoices are professional and effective. For more resources on invoice templates, check out our collections on remote services, event invoicing, and specialized fields like civil engineering. Happy invoicing!
Practical Document Examples